


How to connect the mouse to a desktop or notebook PC
If you have a classic USB mouse and you need to connect it to a computer, be it desktop or laptop, you just have to follow the instructions that I am going to give you in the following parts of this chapter, dedicated to both desktop computers with Windows operating systems and Macs.
Windows
Fixed PCs sold with on board Windows, the operating system from Microsoft, are almost always equipped with ports USB-A, which can be used to connect mice and other types of USB devices (keyboards, USB sticks, etc.): generally, the most easily accessible ports are located in the front of the case or on one of the side edges of the same.
Other USB ports are then placed on the back of the computer, where there are also the other connectors useful for connecting external peripherals (such as the HDMI port, the one dedicated to the monitor).
However, in order to use the mouse with Windows, you simply need to connect it to one free USB port on your computer and wait a few seconds for it to be recognized by the operating system. When this happens, you can use the newly connected device, without doing any additional configuration.
Personally, I advise you to use the more difficult to access USB ports, such as those located on the back of the case: since the mouse is a device that you will probably not disconnect often, it would be convenient to dedicate the front USB ports to other devices designed for use. temporary (e.g. USB sticks).
The steps illustrated above can be put into practice, without problems, even on notebook: The USB ports, in this case, are located on one of the side edges of the laptop.
If those available aren't enough, I suggest you consider buying one USB hub, capable of increasing the number of USB ports available.
These devices, which can be purchased online for a few euros, must be connected to a free USB port and do not require any kind of configuration.
How do you say? Your mouse does not have a USB port, but an old connection PS / 2 (the purple "plug" with many metal teeth inside)? Then you have to look for the relevant connection port (also of purple) on the back of the case, usually at the top.
When you have found it, gently connect the mouse following the metal guides inside it and, when done, restart your computer to make Windows recognize the device you just connected.
Be warned: most modern desktop computers may not have a PS / 2 connector, while on notebooks this connector has long since been phased out. If necessary, you can remedy this problem and "transform" the PS / 2 mouse into a USB type mouse, using a PS / 2-USB adapter, available for a few dollars, even online.
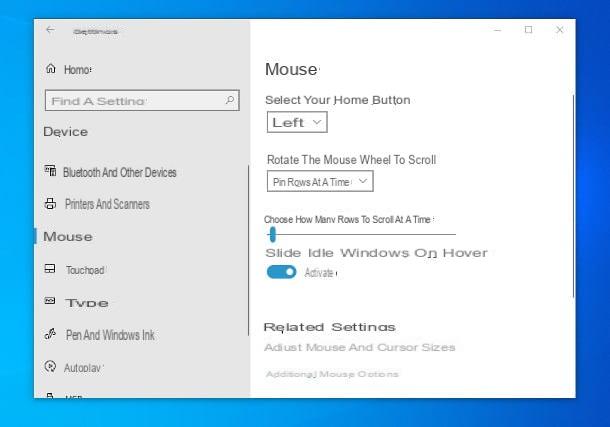
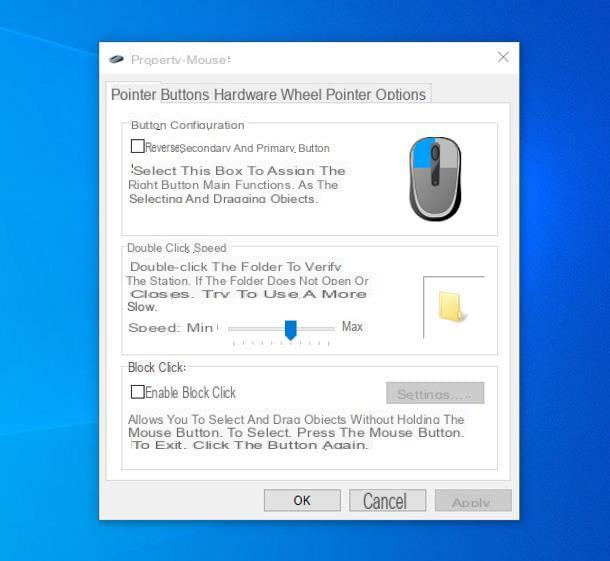
If necessary, you can configure some aspects of mouse behavior (e.g. pointer speed, tracking, or left-handed mouse use) via the operating system settings.
Stai using Windows 10, right click on the Start button (l'icona della pennant) located in the lower left corner of the screen, select the item Settings from the menu that is proposed to you, click on the icon devices and finally go on Mouse (to the left).
On previous versions of Windows, however, you have to act through the Control Panel, which you can recall from Start menu: in this case, you must first click on the item Hardware and sound, then on the voice Mouse, located under the section Devices and printers.
If the mouse is not recognized, I suggest you connect it to another USB port to verify that the problem is due to a malfunctioning port. If, on the other hand, the operating system complains about the absence of drivers, you could try to solve the problem using one of the missing driver programs, which I told you about in one of my previous tutorials.
Note: the operation of some mice, such as gaming mice, can be configured in detail after installing the drivers and management software supplied with the device. In this regard, I invite you to refer to the user manual of the same to obtain all the relevant information.
Mac
It was arranged di Mac desktop type, such asiMac or Mac Mini, you can rest assured: both families of Apple computers have USB-A ports to connect the mouse to. To be precise, the USB ports for connecting the mouse and other devices are located on the back of the iMac.
On Mac Mini, the USB ports are located, together with the Thunderbolt inputs, on the rear edge of the device, near the power button of the device.
Again, in order to use a USB mouse, simply connect it to one of the free ports on the Mac and wait for the operating system to recognize it automatically.
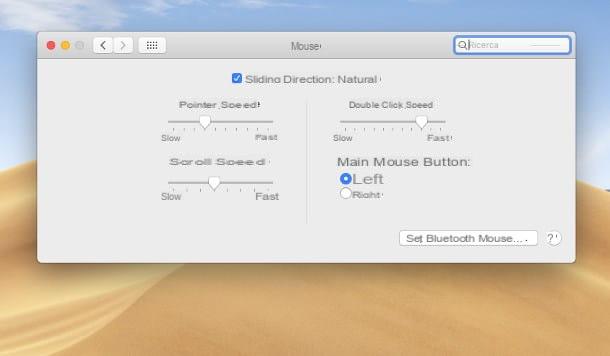
If you want to customize the behavior of the device, you can go to the area of System preference (accessible by clicking on the icon in the shape ofgear located in Dock) and click on the icon Mouse, in order to access the device configuration screen.
Generally, the steps to take to use a mouse on Apple laptops, i MacBook, they are the same; however, some notebooks of this type do not have a USB-A port, but only a Thunderbolt port, which is compatible with the USB-C standard. In this case, you can easily stem the problem by equipping yourself with a special USB-A / USB-C adapter, like the ones I propose below.
How to connect the Bluetooth mouse to the PC
Since you don't really like having wires scattered around your desk, you have opted for the purchase of a mouse Bluetooth and, for this reason, you did not find the information I have given you very useful. Well, this is the most suitable section for you: below, in fact, I will explain the steps to take to pair a Bluetooth mouse to a Windows computer and a Mac.
Windows
You have purchased a Bluetooth mouse and you don't know how to pair it with your computer? Do not worry: this is an extremely simple operation, which I will now explain to you in detail.
To be able to connect a Bluetooth mouse to a PC Windows, you must first activate Bluetooth on your computer: if you have Windows 10, click on the icon comic placed next to the clock and then on the button Bluetooth (I cheer with the Stylized B), until it lights up.
Alternatively, you should be able to activate Bluetooth from the notebook keyboard by pressing the key Stylized B (possibly together with the key Fn) or by moving the switch to the position of to. For more information on how to activate Bluetooth on your PC, I invite you to read the guide I have dedicated to the topic.
If your computer does not natively have Bluetooth support, you need to purchase a dongle that can provide that connectivity to your computer. They cost a few euros and can be found in any online store.
After turning on Bluetooth on your computer, turn on the mouse by moving up ON the physical switch located on one of its sides or at the bottom and, if necessary, press the pairing button for a few seconds, until its LED starts flashing rapidly.
Once this is done, proceed to pair the Bluetooth mouse to the computer following the procedure that best suits the operating system you are using.
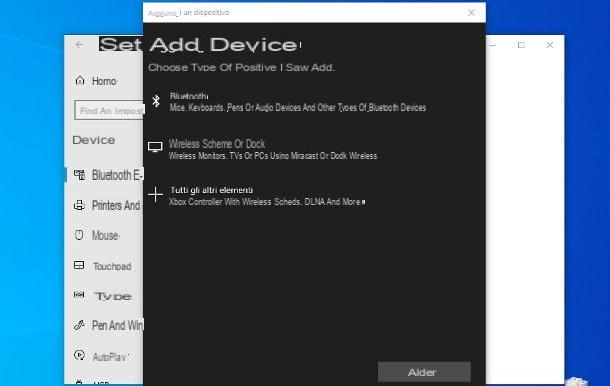
- Windows 10 - right click on the button Home, choose the item Settings from the menu that is proposed to you and click on the icon devices attached to the window that opens. Then click on the item Bluetooth and other devices (left), click the button [+] Add Bluetooth or other device. At this point, click on the item Bluetooth and wait for the mouse name to appear in the list of detected devices. Finally, click on his name and then on the button Connect: once connected, you can immediately start using the new mouse.
- Windows 8.1 and Windows 7 - apri il Control Panel calling it up from the menu Homeclick sulla voce View devices and printers e fai clic sull'opzione Add device, located immediately under the heading Devices and printers. At this point, click on mouse name that appears in the new window that opens and click on the button NEXT to complete the connection.
Clearly, the pairing procedure must be carried out only the first time you use the mouse: afterwards, it will be sufficient to turn on the latter and activate the Bluetooth of the computer for the two devices to pair automatically.
Mac
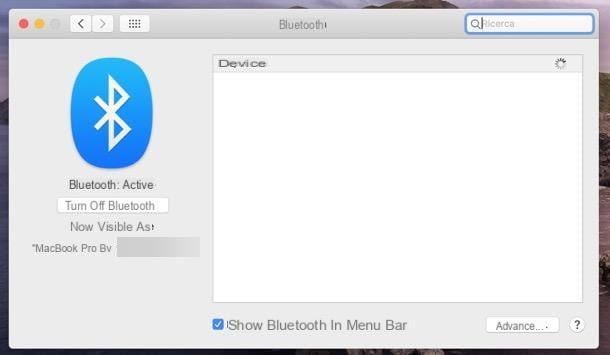
If you use a Mac and you intend to connect a Bluetooth mouse to it, first make sure Bluetooth is turned on on your computer. To do this, click on B stylized resident at the top right, on the top panel of the Mac and, if necessary, click on the item Turn on Bluetooth attached to the menu that opens.
If this icon is not present in the menu bar, access the System preference, by clicking on thegear attached to the bar Dock, choose the icon Bluetooth and click on the button Turn on Bluetooth, placed laterally. Finally, to view the shortcut in the Mac panel, put the check mark next to the item Show Bluetooth in the menu bar (down).
After this step, turn on the mouse by moving up ON the physical lever located on one of the sides (or at the bottom of the device) and, if provided, press the pairing button for a few seconds.
Afterwards, go back to the System Preference, access the section dedicated to Bluetooth, by clicking on the icon of the same name, and wait for the mouse to be identified and shown in the list of available devices. When that happens, click the button Connect placed next to the mouse name, then on the button Match And that's it.
Note: if the mouse you want to pair is a Magic Mouse or Magic Mouse 2, you must, instead, follow the instructions I gave you in the dedicated chapter of this guide.
How to connect wifi mouse to PC
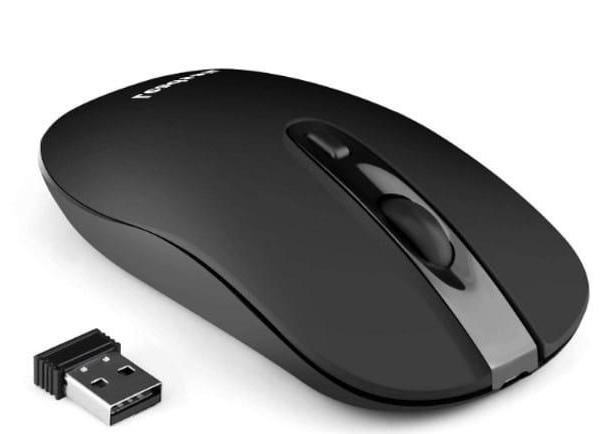
You bought a mouse with wireless USB receiver and now you don't know how to connect it to your computer? Trust me, it's a lot simpler than it sounds.
First, connect the wireless receiver to one of the free USB ports on your computer, insert the batteries into the mouse, if necessary, and turn it on by moving to ON the physical lever placed on it.
At this time, if the receiver and mouse have the function plug and play, and therefore pre-paired, you don't have to do anything else, except start using the device right away. If, on the other hand, the mouse does not have this functionality, you must take care to press the button responsible for starting the connection between the receiver and the mouse itself: usually, it is located on the sides of the latter or between the two upper buttons.
If you have a MacBook Pro with ports only Thunderbolt (and therefore USB type C) and you are unable to connect the receiver to it, you can remedy the problem by equipping yourself with a USB-A / USB-C adapter.
How to connect a mouse to two PCs
It is your intention connect a mouse to two PCs at the same time, know that you can act in two different ways: by getting one 2-to-1 hardware switch, to be connected to both computers, or by using a special program for sharing the mouse.
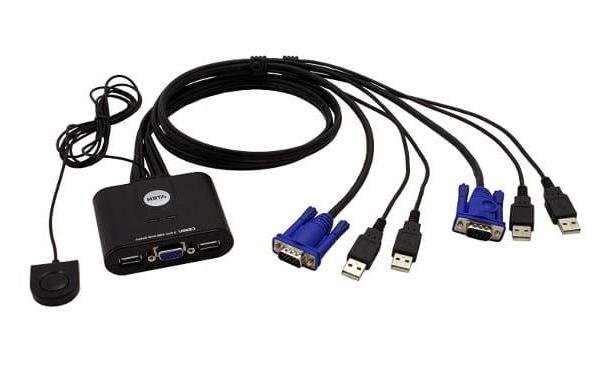
If you had never heard of one, one switch 2-1 it is a hardware component that, after connecting to two nearby computers, allows you to share some external peripherals, such as mice, keyboards and monitors, among them. Its operation is not complex: you have to connect the peripheral to be shared, in this case the mouse, to the USB port located on the central unit of the switch.
Next, you need to use the outgoing cables to connect the two sides of the switch to the PCs designated for sharing the peripheral. Clearly, for this solution to be conveniently applicable, the computers must be physically close together.
Once the hardware connection is complete, it may be necessary to install a dedicated program on both computers. Once the configuration is complete, it is possible to pass the control of the mouse from one computer to another by acting on a special switch, or by using a precise combination of keys.
The 2-1 switches can be purchased in the most well-stocked computer stores, or online.
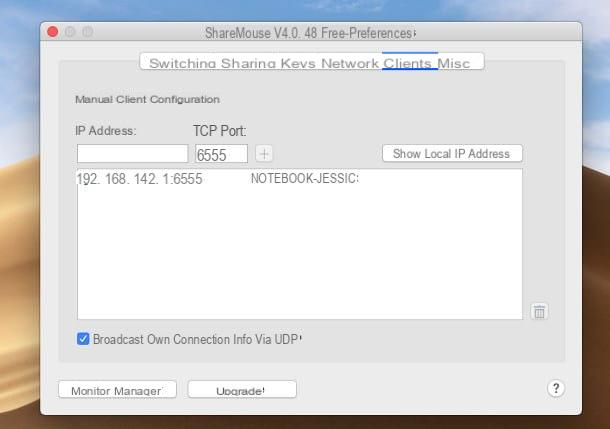
Alternatively, you can connect the mouse to two PCs at the same time using a program such as ShareMouse, available for Windows and macOS: this is a commercial software, which however can be used free of charge for personal purposes, as long as you restart it every half hour (at the same suggestion by the manufacturer) and not to use it on more than two PCs .
To obtain it, connected to this website, put the check mark next to the box I accept the license terms and click on the button Windows download, if you are on Windows, or on Mac Download, if you need to download the program on macOS.
When the download is complete, start the downloaded package (eg. ShareMouseSetup.exe) and, if you are on Windows, click on the buttons Yes e Next, then put the check mark next to the item I accept the agreement and finish the setup by clicking on the buttons Next e Finish.
If, on the other hand, you find yourself on MacOS, drag the icon of ShareMouse in the folder Applications of the Mac, then access it, double-click on the icon ShareMouse e premium pulsating apri to overcome the security restrictions imposed by macOS (you only have to do it the first time).
Successively click on your button Open system preferences attached to the window that opens on the screen, move to the tab Privacy and click on padlock located at the bottom left to enable changes, by entering the Mac administration password when necessary.
Finally, put the check mark next to the item ShareMouse located in the central part of the window and click on the button OK resident in the ShareMouse warning screen.
When you are done, repeat the operation on the second computer you intend to control and ... that's it! If everything went well, you should immediately be able to use the mouse on both PCs: to do this, you need to move the cursor over the right edge of the screen, starting from the computer you configured first, or over the edge. left, starting with the computer you last configured.
To temporarily disable ShareMouse (and return mouse control to the main computer, i.e. the one you configured first), press the key Esc keypad twice consecutively.
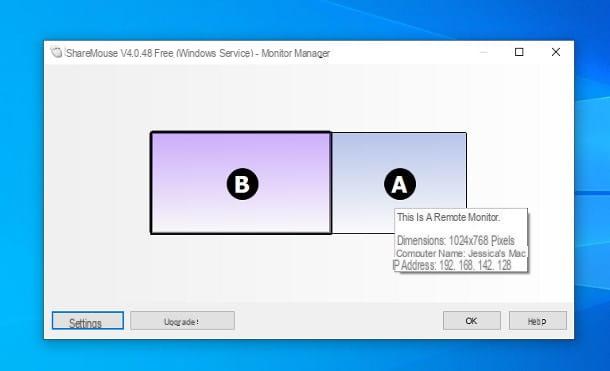
To set the order of the computers, all you have to do is click on the icon ShareMouse (Quella a forma di mouse dart) located inWindows notification area or in macOS top panel I will select the voice Monitor Manager from the menu that appears on the screen.
If you wish, you can access the program's advanced settings (synchronizing notes and events, adding passwords, etc.) by clicking on the button Settings, residing in the window seen above.
How to connect the Magic Mouse to the PC
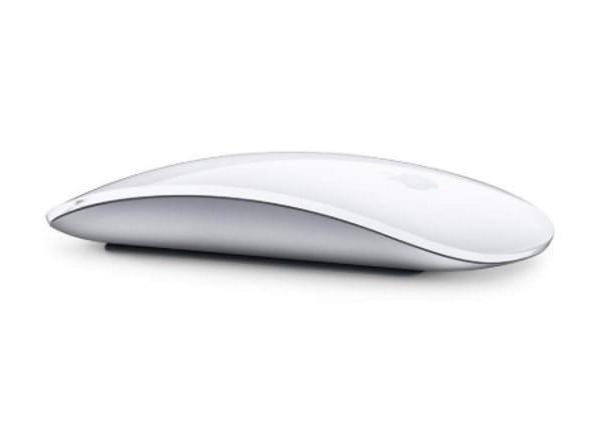
You are equipped with a Magic Mouse from Apple and don't know how to pair it with your computer? Don't worry, it's much simpler than it sounds.
If the mouse you are interested in pairing is a Magic Mouse 2 that was sold to you together with the Mac, you don't have to do anything to connect it to the latter, other than turn it on, as the devices have been pre-paired by the manufacturer.
If you have purchased the Magic Mouse 2 separately, however, you can pair it with your Mac by simply connecting it to your computer via a Lightning to USB cable, or a USB-C to Lightning cable.
What you need to do, once you have what you need, is to thread the cable into the Lightning port of the Magic Mouse and use the other end to connect the mouse to the Mac.
Once connected, you need to open the System Preference and go to the screen Bluetooth to have the device automatically recognized: when this happens, you can unplug the cable and start using the mouse right away. Note that the Magic Mouse 2 cannot be used while connected by cable.
If, on the other hand, you have the First generation Magic Mouse, you can connect to the Mac using the "classic" procedure via Bluetooth: to be able to do this, follow the instructions I explained to you in one of the previous chapters of this guide.
Once the connection between the Mac and the Magic Mouse has been established, you can customize the available gestures by going to the System preference and selecting the voice Mouse.
For more control over gestures, you may want to consider using third-party software, such as BetterTouchTool, which I told you about in my guide on how to program mouse keys.
Connect the Magic Mouse to Windows
It is your intention connect the Magic Mouse to Windows and use, at least in part, the gestures available on the same, you must install the drivers necessary for the integration of the latter, even before making the actual connection between mouse and computer.
Unfortunately, Apple has designed the Magic Mouse for exclusive use on Macs and does not have drivers specifically dedicated to Windows, however it is possible to contain the problem by installing the appropriate drivers. Boot Camp, the "mechanism" integrated in Macs that allows you to start the Windows operating system on them. For additional information on Boot Camp, I suggest you take a look at the guide I have dedicated to the topic.
So, to begin with, connected to the website dedicated to Boot Camp drivers, click on the link Download, located in the box for the latest version of the Boot Camp Support Software, and wait for the file to be completely downloaded to your computer.
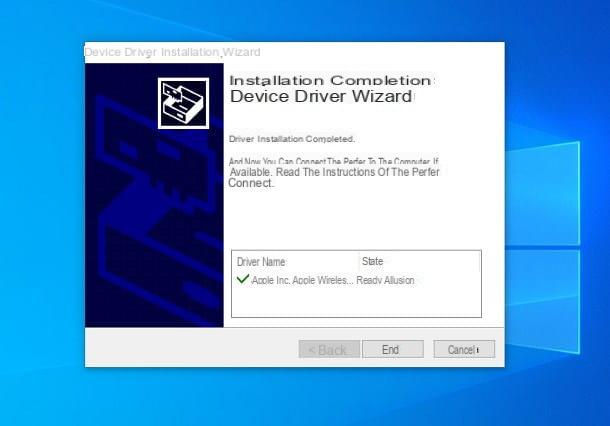
Once the download is complete, extract the archive (eg. bootcampx.yzzip) in a folder of your choice, enter the folders BootCamp, Drivers e Apple and double-click the file AppleWirelessMouse64.exe, placed inside the latter, to start the installation of the Magic Mouse drivers.
At this point, click on the buttons Yes e NEXT, put the check mark next to the item I accept the contract, press the button again NEXT and, to complete the setup, click on the button end.
Once the drivers have been installed, you can pair the Magic Mouse 2 (or the Magic Mouse) to your PC via Bluetooth, following the instructions I have given you in this section. Once the association is successful, you can manage the behavior of the mouse by going to Settings> Devices> Mouse (on Windows 10) or Control Panel> Hardware and Sound> Mouse (on previous versions of Windows).
Note: The installation file for the additional drivers dedicated to Magic Mouse 2 / Magic Mouse is only available for 64-bit versions of Windows.
How to connect the mouse to the PC


