


Much more than a word processor, Word offers to insert a whole series of graphic elements in its documents, such as geometric shapes drawn with the mouse or the Trackpad.
This tutorial shows you how to insert shapes with unlimited outlines to add a new dimension to your text documents.
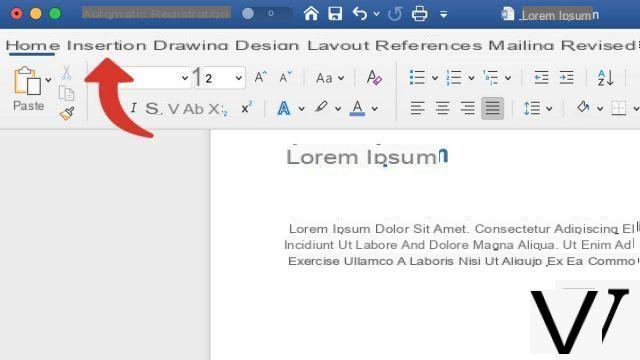
Draw a geometric shape in Word
- Click on the tab Insertion.
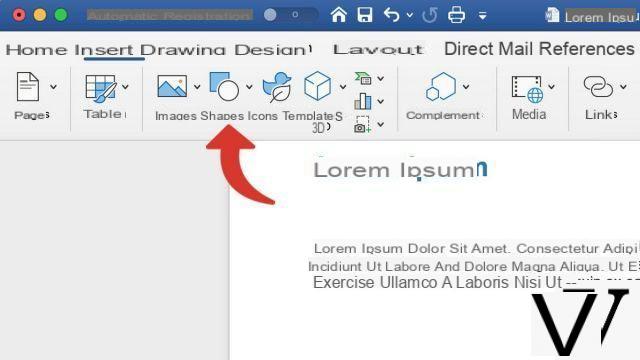
- Click on the button Forms.
- In the drop-down menu, under the section Features, select Free Form.
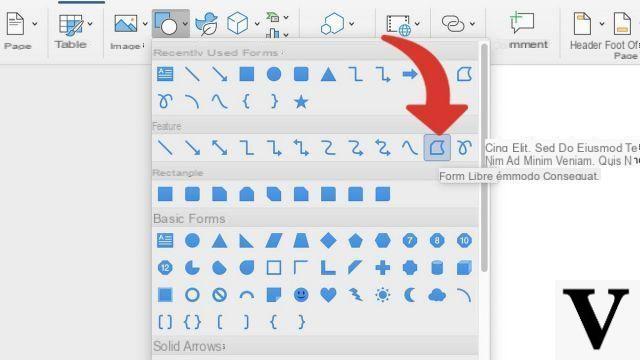
- This option allows you to create a geometric shape alternating straight lines and freehand drawn curves. Click anywhere in your Word document to start adding sides to your geometric shape. Keep pressed if you want to hand-draw part of the shape.
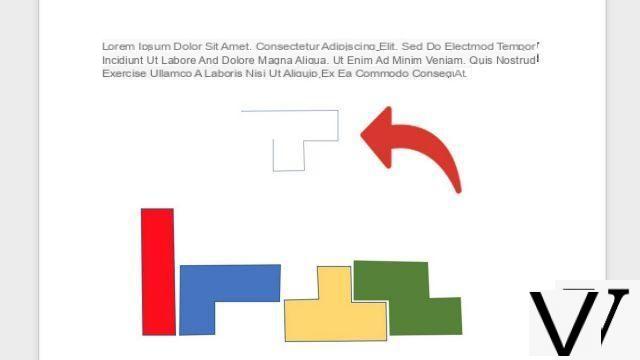
- To complete the drawing, join your starting point and click on it.
Once your geometric shape is complete, right click on it and click Shape format. In the right column, you can change all aspects, such as the color or thickness of the line.
To download :
Microsoft Word for Windows 10 | Microsoft Word for MacOS
Find other tutorials on Word:
- How to insert a geometric shape in Word?
- How to add watermark in Word document?
- How to add background to Word document?
- How to quickly insert screenshot in Word?
- How to insert picture in Word document?


