


How to connect the scanner to the Windows 10 PC
connect the scanner to the Windows 10 PC, you must first remove the device from its packaging, remove all the security seals and place it near the computer, so that it can reach both one of the USB ports of the latter and the power outlet (necessary to power the device).
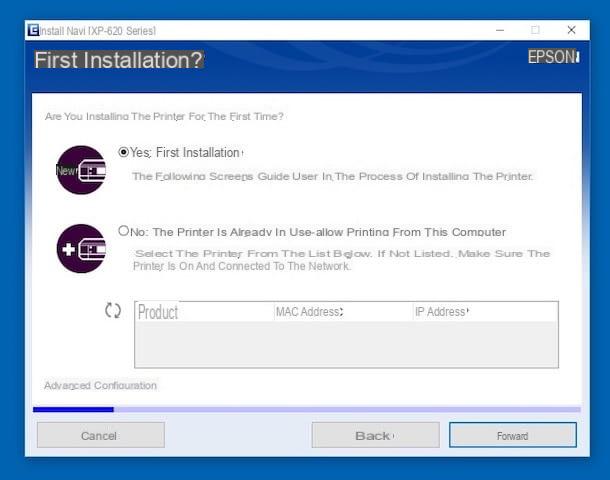
Now, if you own the Installation CD scanner (or multifunction printer), insert it into your computer and wait for the program dedicated toguided installation device starts automatically. If this does not happen, proceed to manually open the appropriate file, starting theFile Explorer Windows (the icon depicting a gialla poster, located on the taskbar) and double clicking on theicon of the inserted disc.
Once the installation program has started, you just have to follow the instructions that are shown on the screen to configure the device correctly: generally, just press the button NEXT for a few consecutive times and, when required, turn on the scanner e connect it to your computer.
If you have not been provided with an installation disc in the sales package, or if your computer is not equipped with an optical reader, you can try to retrieve the drivers from the Internet by searching on Google: then type the text [brand and model scanner driver Windows 10] in the search box and carefully consult the results returned.
At this stage, I strongly recommend that you download material only and exclusively from reliable sites, even better if from the official web portal of the scanner manufacturer. Once the download is complete, launch the file obtained and, also in this case, follow the instructions displayed on the screen to install and configure the scanner.
If you don't feel like going on your own and need some more information to make sure you are downloading the correct drivers, you can take a look at my guides on how to find HP drivers, Canon drivers, Samsung drivers and Epson drivers, or mine tutorial on how to recover missing drivers, if your scanner manufacturer is not listed.
If what you are using, on the other hand, is a multifunction printer with wireless connectivity, the situation is slightly different: devices of this type, in general, can be configured in a few minutes, using a special software available from the Internet.
To give you a practical example, scanners combined with HP wireless multifunction printers, can be easily installed on Windows 10 using the application HP Smart: to obtain it, connect to this website and click on the button Get twice consecutively, in order to install it using the Microsoft Store.
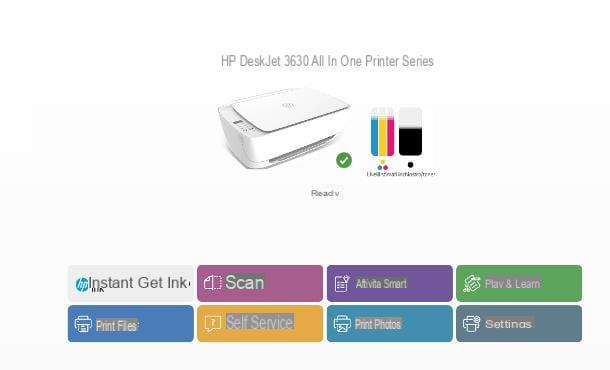
When installation is complete, open HP Smart from the menu Home Windows, click on the button Continue and specify if whether or not to share usage data with HP, using the dedicated button; then click on the button for configure a new printer, wait for the name of the multifunction appears in the list of detected devices (if this does not happen, make sure that the printer is turned on) and click on the relevant box, marked with the wording Configuration.
At this point, follow the instructions given to you to connect the printer to the WIFI network in use on the computer and to join the program or not HP Instant Ink (the system able to automatically order consumables, close to exhaustion): therefore click on the buttons Continue e Yes to automatically transmit the network key to the printer, press the buttons Continue e Salta and then up again Continue, to advance to the configuration procedure of HP Instant Ink.
To avoid joining the program, check the box I'm not interested and click on the buttons Continue e No, I don't want to sign up for Instant Ink; finally, specify the resort use of the printer, press the button Continue, select the voice Ignore posting for this link and finish it all by clicking on the button Not now.
For further information regarding the installation of the scanner of HP printers, I refer you to reading the specific tutorial I have dedicated to the topic; if, on the other hand, you need specific information on how to connect the Epson scanner to the PC, you would do well to carefully read the specific tutorial I dedicated to the subject, focused precisely on the devices marketed by the aforementioned manufacturer.
Once the scanner has been installed and configured, you can immediately start using it using a special tool, which it could be Windows Fax and Scan, that is the scanning software included “standard” in the Microsoft operating system.
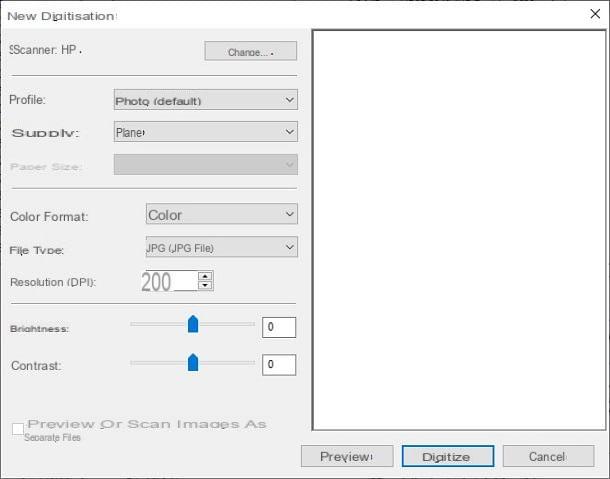
So, call the aforementioned program from the folder Windows Accessories located in the menu Home (the one accessible by clicking on pennant located at the bottom left) and, to start, click on the button New digitization which is located in the upper left corner of the window that opens.
Now, use the drop-down menu Profile to indicate the category of content to be acquired (eg. Documents o Gallery), served from the menu Color format to define the color settings and specify the file format in which to save and the resolution of the latter using, respectively, the menu File type and the field Resolution (DPI).
Make all the necessary adjustments, press the button Preview to preview the scanned file: if you are satisfied with the result, click on the button Digitize, to start the actual scan: all files scanned in this way are automatically saved in the folder Digitized documents, located in the directory Documents of Windows.
To learn more about the use of Windows Fax and Scan and other useful software for scanning with Windows 10, I refer you to reading the tutorial I dedicated to the topic.
How to connect the scanner to the Mac
In most cases, the steps to take for connect the scanner to the Mac they are simpler than those already seen for Windows: generally, it is sufficient to turn on the scanner, connect it to the computer via cable and wait for macOS to automatically configure the device.
To verify that everything was successful, open the System preference, by clicking on the symbol in the shape ofgear placed on the bar Dock, reach the section Printers and scanners and verify that the name scanner. If not, manually add the device to your computer by clicking on the button [+] at the bottom left and selecting the device from the proposed list.
If automatic recognition fails, select the item instead Add printer or scanner ... from the menu that has just opened, click on name of the scanner that resides on the card Default and, if necessary, indicate the position and tech acquisition. To finish, click on the button Add And that's it.
If, on the other hand, your scanner is attached to a multifunction printer, configure it using the software released by the manufacturer: for devices HP, for example, you can take advantage of the application HP Smart, available for free on the Mac App Store. To get it, follow this link, click on the button Ottieni / Installa and verify your identity with an Apple ID password or Touch ID, so that it can be installed on your computer.
Once this step is completed, launch the application you just obtained and carry out exactly the same steps already seen for Windows. For more information on installing and configuring multifunction printers on Mac, you can read my tutorials on how to connect a printer and how to set up a Wi-Fi printer.
However, once you have configured your scanner properly, you can quickly scan your documents using Image capture, the program available "standard" in macOS dedicated, precisely, to the acquisition of images and documents.
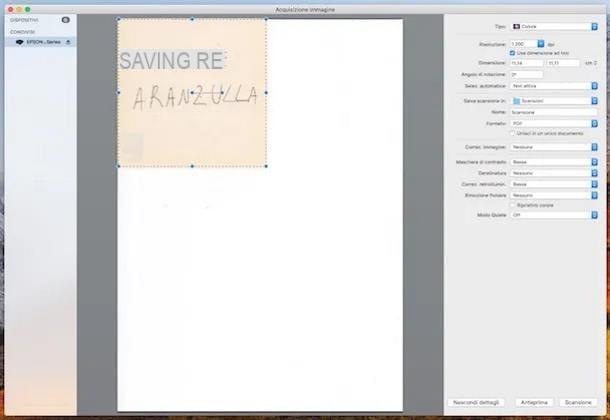
So, call up the aforementioned program from the Launchpad macOS (the rocket which resides in the bar Dock), make sure that in the drop-down menu multifunction printer / scanner yours is selected scanner (otherwise do it yourself) and click on the button Show details, to start a preview scan.
After this step too, intervene on the controls, colors and image quality using the available functions, indicates the name to be assigned to the resulting file in the appropriate field, specify the format in which to digitize the document using the appropriate drop-down menu and, if you deem it appropriate, specify the saving directory in the menu Save scan to. When it is finite, click on the button Scan to scan the document with the specified settings (more info here).
How to connect the scanner to the PC


