


How to connect PC to TV monitor
Let's start this guide by understanding, together, how to connect PC to TV monitor both wired and wireless. The instructions in the following paragraphs can be used to establish the connection to “classic” monitors, TV monitors and even real televisions.
How to connect PC to monitor with cable
Before you can connect the PC to the monitor with cable, you must first analyze the sockets located on the back of the case and on the monitor itself, so that you can choose and use the most appropriate connection cable.
In particular, if you are interested in connecting two screens at the same time, you must make sure that the video connection ports available on the PC are at least two and that the same are also present on the chosen monitor. Below is a list of the most common connection ports (with their cables).
- HDMI - without a shadow of a doubt, it is the most widely used output technology to date, present on most computers, classic monitors and TV monitors. It can transmit / receive content up to 8K resolution (7680 x 4320 pixels) with 60 Hz refresh rate and manages the audio stream up to 32 channels. For the transmission of content at 4K resolution or higher, HDMI cables of type 1.4 or higher must be used.
- USB Type-C - Some high-end convertible notebooks, as well as Apple's MacBooks, allow you to connect your computer to external monitors via a dedicated USB Type-C cable (together with an HDMI or Mini DisplayPort adapter). Again, extremely high resolutions can be achieved, up to 8K at 60Hz. Audio stream can be handled.
- DVI - is another widely used video transmission standard, which allows to reach QHD resolution (2560 x 1600 pixels) at 60 Hz and to manage the audio stream. There are also commercially available cables to "transform" an HDMI input into a DVI output, and vice versa, which can be used when one of the devices involved has only one DVI port available, while the other has HDMI.
- DisplayPort / Mini DisplayPort - is a video connection port available on many computers, even relatively recent ones, and on older generation MacBooks. The theoretical maximum resolution supported is 8K at 85Hz.
- VGA - until a few years ago, it was the most widely used standard for the connection between PC and monitor. This port is present on many computers, but may be missing on more modern ones, as well as on the latest generation monitors. Being an analog standard, it does not manage the audio stream and supports a maximum resolution of FullHD, at 70 Hz, although the rendering of contents with quality higher than HD is not optimal.
- S-Video - this input has a round shape and its cable ends with a round plug; it is present on older computers and monitors, does not manage the audio stream and supports a maximum resolution of 800 x 600 at 50 Hz.
Once you have the cable that best suits your needs, use it for connect the computer to the monitor using the input and output ports located on the devices.
After that, turn on the monitor and repeatedly press the button src / source, to set it to the chosen input (eg. HDMI). If everything went well, you should see the images coming from the computer projected.
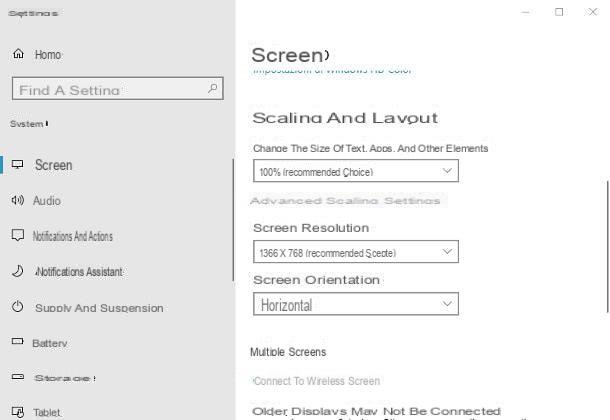
To change the screen resolution, if you use Windows 10, right click on an empty spot on the desktop, select the item Screen resolution from the contextual menu displayed and use the drop-down menus located in correspondence with the section Resizing and layout to define the necessary settings.
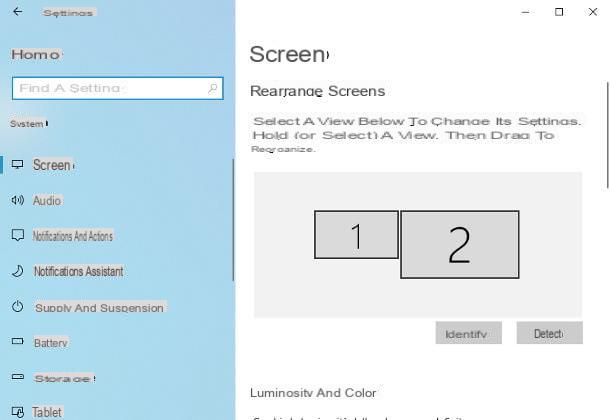
If you are using the monitor in question as a second monitor, you can define the resolution and ordering of each of the screens, acting on the items below the wording More screens.
I invented, I used a Mac, you can access similar options by opening the System preference (the symbol in the shape ofgear place on the Dock) and reaching the section Monitor. To change the screen resolution, then use the card Monitor; to manage the duplication settings, if you have connected multiple displays, you can use the tab Layout.
How to connect the PC to the wireless monitor
connect the PC to the wireless monitor, you must first check the type of screen you have: if the latter supports it integrates support for the Miracast protocol and wireless connectivity, you don't need to buy anything.
For your information, Miracast is a broadcast standard that works over Wi-Fi direct, does not require any supporting network equipment (e.g. router), and can stream content up to resolution 4K UltraHD, the 60fps. Clearly, this last parameter varies greatly, depending on the video installed in the PC and the maximum resolution supported by the screen.
If, on the other hand, you want to use a “classic” monitor, not equipped with integrated connectivity, you have to buy a special one Miracast adapter, to be connected to the HDMI input of the display (and to a power source, also via USB).
However, if you own a monitor with wireless support, turn it on and, if necessary, enable the reception of contents through the appropriate menu; if, on the other hand, you have opted for an external adapter, connect it to the appropriate port on the monitor (powering it via USB, if necessary), turn on the latter and set it to HDMI sourceby pressing the physical key several times source / SRC.
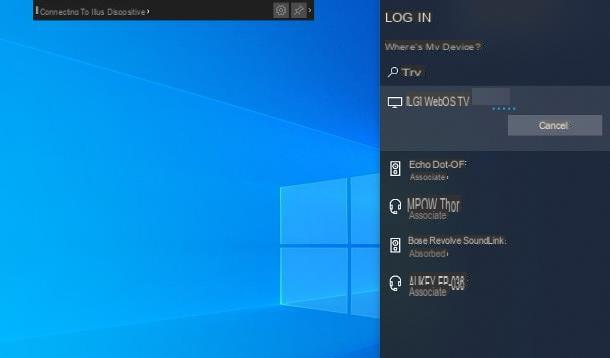
At this point, go back to the computer, start Windows 10 and recalls thenotify area system by clicking on the comic placed next to the clock. Next, click on the button Connect (if you don't see it, press on the item first Expand), wait for the name of the Miracast monitor / adapter appears in the list of detected devices and click on it, in order to start the transmission of the screen.
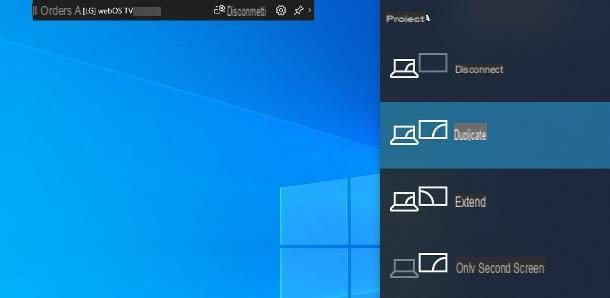
By default, screen mirroring will be enabled; to change this behavior, go back to the Windows notification bar, press the button Project and click on the button Extend, to use the monitor as a desktop extension, or Second screen only, to deactivate the primary monitor.
If you see fit, you can change the resolution and l 'orientation of the second screen, acting in the same way as seen in the previous section of this guide.
And up Mac? Well, in this case there isn't much you can do: the only "direct" transmission method from computer to monitor, provided by Apple branded devices, is to use proprietary technology AirPlay, by connecting a device to the monitor Apple TV (more info here) or, alternatively, using a Smart TV with integrated AirPlay instead of a PC monitor.
How to connect the laptop to the external monitor
Do you want connect the laptop PC to the external monitor? No problem: the instructions to follow are very similar to those already seen for Windows. The only difference lies in the range of ports available for cable connection which, on notebooks, could be very small: many laptops have ports only HDMI / miniHDMI e VGA, while the more modern ones have abolished the latter as well.
However, if you own a latest generation combinable or ultrabook, there is a very good chance that the cable connection can be fine-tuned via USB Type-C. Here are all the details.
How to connect desktop PC to laptop monitor
It is your intention connect the desktop PC to the laptop monitor and use the latter as a second screen, know that you can achieve this easily, if a recent version of Windows 10 is installed on both computers involved.
Microsoft's operating system, in fact, hosts within itself a Miracast server which can be enabled, when necessary, in order to transform the computer screen (laptop or desktop) into a wireless monitor.
To enable this feature on the laptop you intend to use as a secondary monitor, click on the button Home Windows 10 (the icon of the pennant located in the lower left corner of the screen) and then on gear symbol located on the side of the menu that has opened.
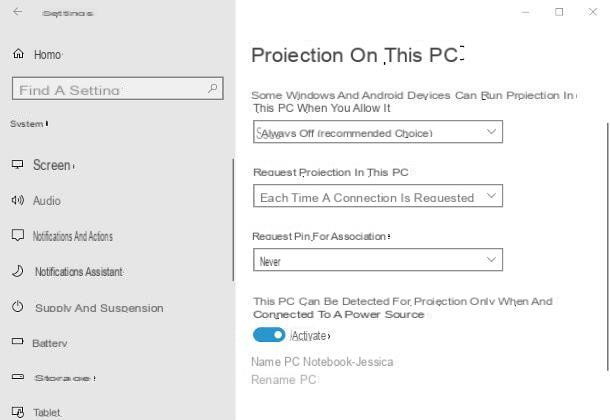
Now, get to the section Systemclick sulla voce Projection on this PC and verify that the drop-down menus attached to the new window that appears are clickable. If not, press your voice Optional featuresclick on your button [+] Corresponding to the dicitura Add a feature and type the words wireless screen within the next screen. Finally, put the check mark next to the only proposed result and press the button Install, per proceeding.
At this point, click on your button Go back (The left arrow located at the top) to return to the projection panel, set the top drop-down menu to Available everywhere in secure networks and choose if require or not a PIN for the association, by intervening on the appropriate menu. Once the settings have been defined, click on the item Launch the Connect app for the project on this PC, which should have appeared at the top of the window in the meantime.
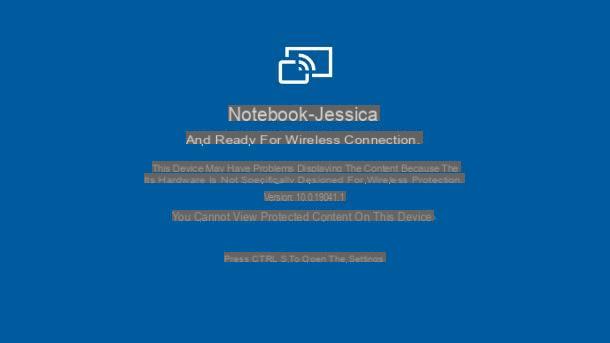
The game is practically done: at this point, move to the PC of which to duplicate the screen (which must be connected to the same Wi-Fi / Ethernet network handset), calls up thenotify area Windows 10, by clicking on the comic placed next to the clock, and then on the button Connect (if you don't see it, click on the entry Expand to view all the "tiles").
To finish, wait for the name of the laptop appears in the list of detected devices and click on it to establish the connection. You can define the screen duplication mode by clicking on the button Project, also located in the Windows 10 notification area.
Note that at any time, you can call up the notebook's “proprietary” Start menu and perform operations on the local copy of Windows by placing the mouse cursor at the bottom edge of the screen.
If you decide to leave the projection settings unchanged, you will not have to access them again for subsequent connections: to enable acquisition from an external monitor, you simply have to start the application on the notebook Connect, calling it from the Start menu.
If the notebook is not equipped with a Windows 10 operating system, you can still view the images displayed on the screen of another PC, by relying on a remote control program, such as TeamViewer: for further information, take a look at the specific guide I have dedicated. to the theme.
How to connect the PC to the monitor


