


Preliminary information

Before getting to the heart of the topic and explaining yourself how to connect the camera to the PC to make video calls, record videos or download photos and videos on the computer, I want to tell you that I will use a reflex Nikon. If you have a camera from other brands, you may notice some differences in the steps to take compared to what I will show you (since each manufacturer has a different PC connection software), however do not worry: the procedure to follow is so great. simple that, even with some voice or button other than clicking, you will be able to do everything without problems.
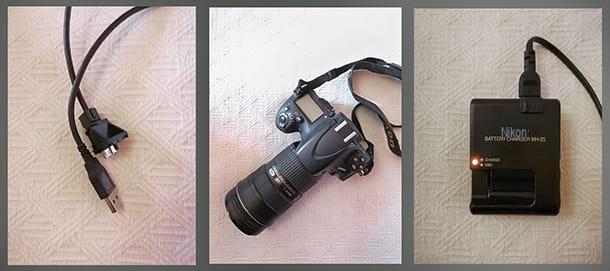
On the other hand, all you need is the software for connecting the camera to the PC (later I will show you where to get it, depending on the model in your possession) and a USB cable, which you probably already found in the camera box.
Before proceeding, also make sure that the your camera's battery is fully charged, also provide for disable the power saving settings and, if your intention is to record or shoot live with the camera, make sure you have a tripod with fluid or ball head to better manage the shots: if you don't have it, you can buy it for a few euros online.
How to connect the camera to the PC to record
If you want to understand how to connect camera to PC to record, or to use it as if it were one webcam, this is the section of the tutorial that suits you the most.
As already mentioned above, the procedure to follow is quite universal but, in the absence of a real single standard, each camera manufacturer has created its own software to make the camera communicate with the computer. I will show you how to connect a Nikon camera to PC through Nikon Webcam Utility, the official software of the Japanese brand, compatible with both Windows that with MacOS.
If you have a camera from another brand, you will be able to use it as if it were a webcam or to record on a PC only as long as dedicated software has been released. At the time of writing, the official software of the various manufacturers are: Canon EOS Webcam Utility, Sony Imaging Edge Webcam, Panasonic Lumix Tether for Streaming, Fujifilm X Webcam e Olympus OM-D Webcam Beta.
Having made this necessary clarification, let's get to the point and see, in detail, how to establish the connection between camera and computer using the software mentioned above.
Windows
Let's start with PC Windows. The first step you need to take is, of course, to download the official software from your camera manufacturer on your PC.
In the case of Nikon, therefore, you have to go to the Japanese company's website, search for the name of the model of your camera in the appropriate area, access the section Software of the page that opens and click on the item for view the download page corresponding to Webcam Utility (Windows). It is then necessary to scroll the next screen, up to the item Contract, put the check mark next to the item Accept, select one regione (Eg. Europe) and press the key Download.
Once the download is complete, you need to start the .exe file obtained and follow the on-screen procedure. If you also have a Nikon camera, you should always click on the button Next and allow the software to make changes to your computer (by clicking on the button Yes). However, the procedure is similar for most of the software for connecting cameras to the PC.
Optimal! You now have the utility you need on your computer. The software Nikon Webcam Utility it is very spartan, you will hardly notice that you have installed it, and it does not require particular settings to be applied. Partially locks the menu of the camera connected to the PC, but leaves some functions active that allow you to intervene on the transmitted image. These are "filters" that vary the color, mood, background blur or appearance of the frame size.
The great thing about utilities for making real webcam cameras is that they simplify the process. In the past you could not have done without an HDMI cable and an external memory, today a USB cable is enough. I recommend you to watch this official Nikon video, released for the presentation of the program. Although in English, it is very intuitive to understand.
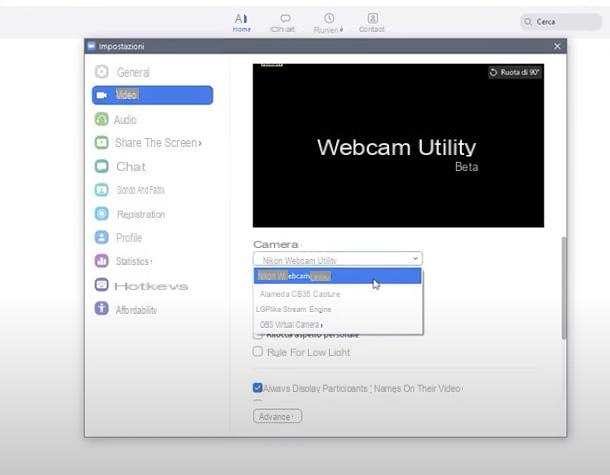
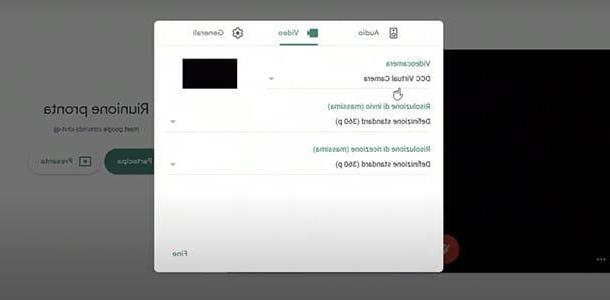
Having said that, however connect the camera to the PC as a webcam, arrange it as you like, connect it to your computer via USB cable, turn it on and activate the Live view, then start the software you intend to use for your conference: Skype, Zoom, Microsoft Teams, or go to Google Meet or Messenger.
Once a program or service has started, you need to access its settings and select Webcam Utility (or in any case the name of your camera or related software) as a video source. In this way, exactly what the camera frames will appear on the screen and, therefore, you can use it as a webcam. As for audio, turn on the built-in one to your PC or connect an external microphone.
If any of the steps are not clear to you, you can search my blog for guides dedicated to configuring the webcam, such as the one in which I explain how to operate the webcam.

How do you say? What interests you is only how to connect camera to PC to record video? There is a solution for this too. You can use a couple of downloadable programs from the web, both of which are free and intuitive to manage.
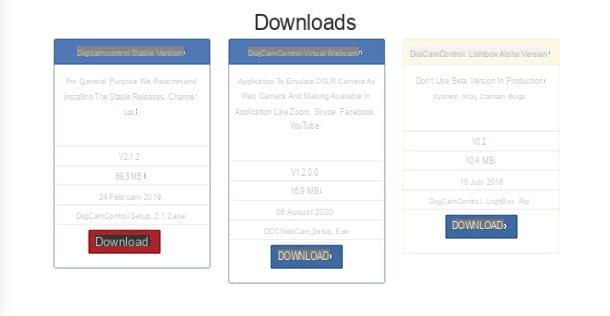
The first of these software is called digiCamControl Virtual Webcam, will help you use your camera during video conferencing, should you have any problems with Webcam Utility.
First you need to check if the camera is compatible with digiCamControl Virtual Webcam, you can do it by consulting the official table at this link. You will see that there are so many models, it shouldn't be difficult to find yours too.
After checking, go to digiCamControl Virtual Webcam official website and click the button Download, identifiable when the page is opened. In the next one, move to the central pane, the one called digiCamControl Virtual Webcam, and once again click on Download.
When the download is complete, start the file DCCWebCam_Setup.exe just downloaded. At the initial prompt to make changes to the device, reply with Yes, please click your Next for two consecutive times e install. If warnings appear on the monitor, always click on Ok. Finally, tap on Finish to conclude the setup.
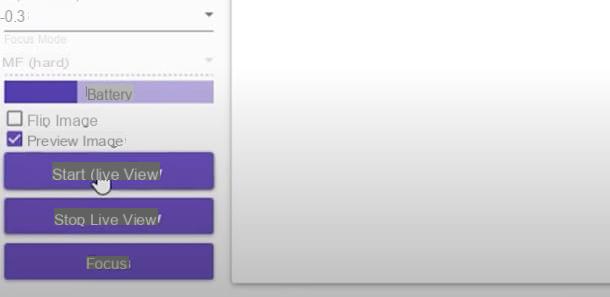
Now it's time to take the camera, connect it to the PC via USB cable and turn it on. After that, digiCamControl Virtual Webcam it should spot it. If everything goes smoothly, move the cursor to the left of the screen and in the lower part of the configuration area put the check on the item Preview Image, click on the button Start Live View.
You did! Then open a service or application to make video calls, go to Settings, then select DCC Virtual Camera as a video source and connect with your interlocutors.
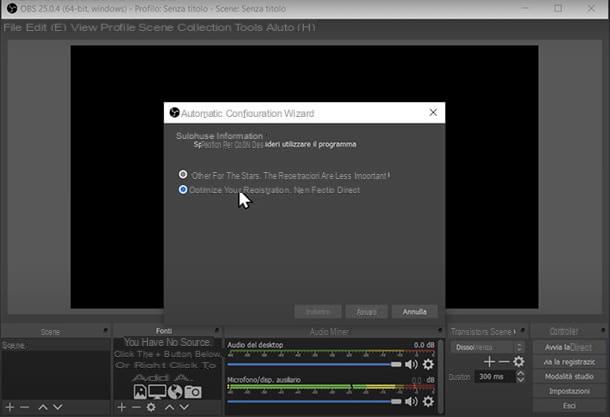
I want to give you another tip on how to connect camera to PC to record, in case you wanted to own create a movie with your camera and not just save video calls. I am referring to the use of the famous recording and live streaming program OBS, which is free and compatible with both Windows and macOS and Linux. It is capable of capturing a large number of video and audio sources simultaneously, including cameras (if recognized by the computer using software such as those from camera manufacturers or digiCamControl Virtual Webcam).
If you are ready, you should connect to the Open Broadcaster Software (OBS) site and press the button for Windows, to download it and then install it: you can find all the details in my guide on how to download OBS.
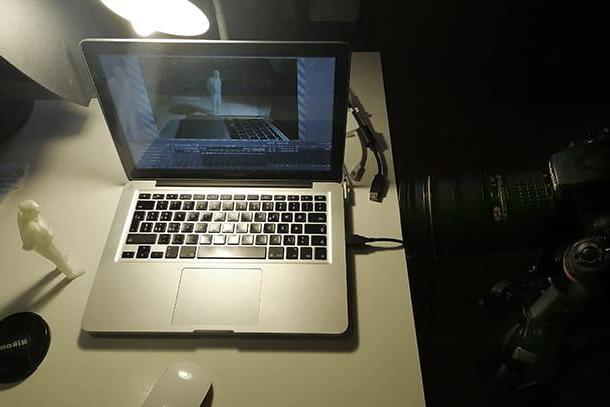
After installation, start OBS, connect the camera to the PC via USB cable and, in the lower part of the program interface, locate the section References. Within it, tap on the '+ icon (Add), which you will need for select the camera as the video source.
You are now enabled to record and save your content. With OBS you can also connect in live streaming on numerous platforms. If you want to know more about this very useful program and its complete configuration, you can find more information in my tutorial dedicated to it.
MacOS
Surely also to you, who are a user MacOS, it is interesting to know how to connect the camera to the computer to be able to use it as a webcam.
The way to proceed is very similar to what we have seen so far, so you need to install the software dedicated to the purpose released by the camera manufacturer. In the case of Nikon, for example, you need to connect to the Nikon official website and proceed as already seen in the chapter dedicated to Windows, but selecting the item relating to Webcam Utility for Mac.
A download complete, apri il .dmg file obtained, start theexecutable present inside and always click on Continue, enter the Mac admin password, when prompted and, finally, press the button Ends, but will conclude the setup.
If you want to take advantage of the camera like webcam, you need to connect it to the Mac with the appropriate USB cable, then turn it on e set Live View. Then start an application like Skype, Zoom or Microsoft Teams, or go to services like Google Meet or Messenger. Within the application or service you intend to use, go to the settings which allows you to choose as your main video source Webcam Utility (or whatever the name of your camera).
If everything went well, you should see the scene the camera is framing on the monitor. Adjust it if necessary, to optimize the recovery. Remember to connect an external microphone o activate the one integrated into the device, to make you feel.
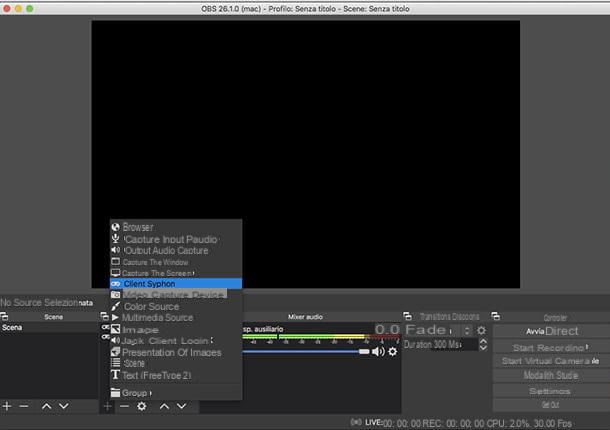
In the event that your camera manufacturer does not provide software for connecting to the Mac, you can turn to the free and open source software Camera-Live, which uses a technology, called Siphon, which transforms the video stream, called native, into a stream suitable for using the camera as a webcam or for recording on the Mac. We could define it as a “bridge program” between computer and camera.
To get it, connected to its official website, select the latest release and click on its link Camera.Live.zip, then extract the software to the folder Applications macOS and launch it.
Now, in case you want to record video with the camera you connected to your Mac, you can smoothly turn to OBS, as I explained to you earlier in the chapter dedicated to Windows and how you find it explained in more detail in my tutorials on how to download and how to use OBS.
How to connect the camera to the PC to transfer data
Have you taken a lot of photos or recorded videos with your camera and now you want to import everything to your PC? You can do this very simply by connecting it to your computer in a couple of ways. Whether you use Windows o MacOS you can use the USB cable, included in any photo kit. Some latest generation cameras also give the possibility to transfer data wirelessly.
In any case, the latter method could be subject to interference and, therefore, less safe (as well as slow). Better still would be to use a SD card reader, to always be connected via USB. It doesn't cost much and is practical, especially in the multi-format card version.
But let's get to the practice and see how to connect camera to PC to transfer data with the applications present on the two major operating systems. If you prefer, you can also use other more specific software for image transfer and post production (including those that each photographic brand associates with their devices), but generally the “standard” operating system tools are more than enough.
Windows
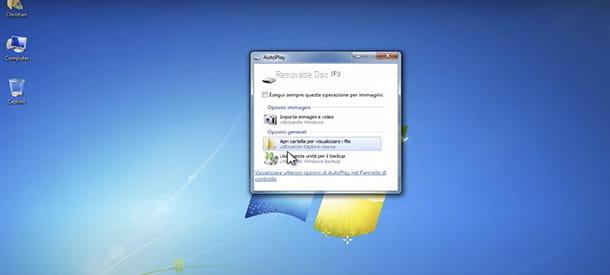
You can't wait to check out the photos from your latest shooting session. But you have to download them on your PC. Leave the memory card with its contents inside the camera and turn it off. Take the USB cable you came with and connect it to your PC. Only now can you turn it on, wait a few moments and you will see the window open in which to select the option Import images and videos in Windows. You may actually want to handle things your way.
Alternatively, start theFile Explorer Microsoft operating system (the gialla poster present on the taskbar, at the bottom left) and, in the window that opens, find yours camera among the peripherals, in the left panel. Then click on the corresponding icon and freely decide where to transfer your files and how to manage them with simple copy-and-paste. When finished, turn off the machine again to not lose data and then disconnect the USB cable. More info here.
MacOS
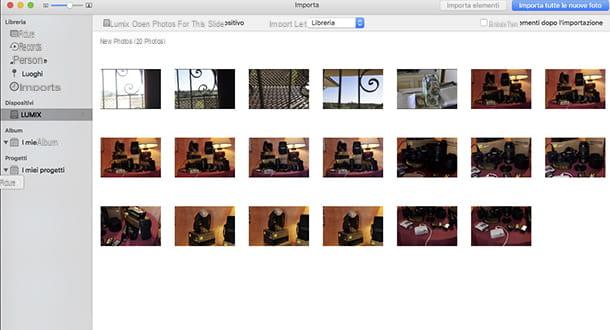
It was used MacOS, you can proceed in a rather similar way to what has just been described for Windows, connect the camera to the computer, turned off and with the memory card inserted in the slot. To do this you need to use the USB cable included in the accessory set of the camera itself. Now you need to turn it on and the application should open automatically Gallery. If this does not happen, it must be selected from the Dock bar (the colored flower icon). Then click on peripheral corresponding to the camera and you will see the contents there. Now you can decide how to import them, whether to add them to the library di Gallery, rather than create a new folder o create a new albumby pressing the appropriate buttons.
If you don't want to use Gallery, you can always take advantage of the application Image capture. Open it from the folder Other of Launchpad and select the device with the name of the camera: you will be shown previews. Now you can choose the images, transfer them to a specific folder with a simple drag or using the buttons on them. When you're done, before unplugging the camera, make sure you've turned it off again.
How to connect the phone camera to the PC
For some reason you may need a webcam. Maybe the one built into your laptop has broken and you don't have an external device or a camera. Everything under control!
If you want, you can use your smartphone's camera instead of your computer's webcam by installing a free app on your phone and software related to it on your computer. The system is more or less similar for both Android and iOS. To learn more, check out my tutorial on how to connect phone camera to PC.
How to connect the camera to the PC


