Are the messages in your Gmail account piling up in a happy mess? Organize your messaging by taking advantage of its powerful classification system by categories and labels.
One of Gmail's great assets over other messaging tools is undoubtedly its message classification system. Articulated around categories and labels (or labels), this tool is extremely effective in automatically arranging messages according to precise rules. Its only flaw is its relative complexity, at least for the configuration phase, as it is full of options for configuring sorting functions. But the game is really worth the effort because once you understand how it works, the inbox becomes extremely readable. Still, you have to dive into it. For this, we will guide you to customize this filing system and organize your messages according to your own rules. Note that most of the settings and tools described (with rare exceptions) work both on the web version and in the Gmail mobile app.
How does Gmail's filing system work?
Unlike other electronic messaging services that rely on folders to classify messages, Gmail is based on two concepts: categories and labels. Alas, the jargon used by Google is sometimes confusing. Indeed, we find mention in the parameters of Gmail "system labels" and "labels" quite simply. And the difference between the two is essential. The name "labels" corresponds to the personal labeling that you can create and configure to classify your messages. As for the system labels, they correspond to the classification principle specific to Gmail. These are tracked, pending, spam, trash, etc. messages. These system labels are not editable or adjustable, but you can choose whether or not to display them in the web (desktop) version of Gmail.
- With your usual web browser, go to your Gmail account.
- In the webmail interface, click on the button Parameters (the gear icon) at the top right of the window.
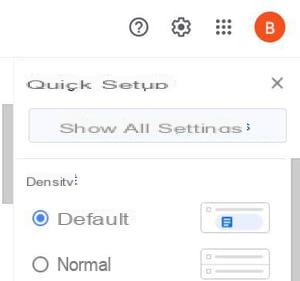
- In the Quick Setup panel that appears, click Show all settings.
- In the settings, open the tab Labels.
- In the System Labels section, click Show, Hide ou Show if unread to adjust the display of the caption in the left pane (the black color indicates that the selected state is active). The change is applied on the fly.
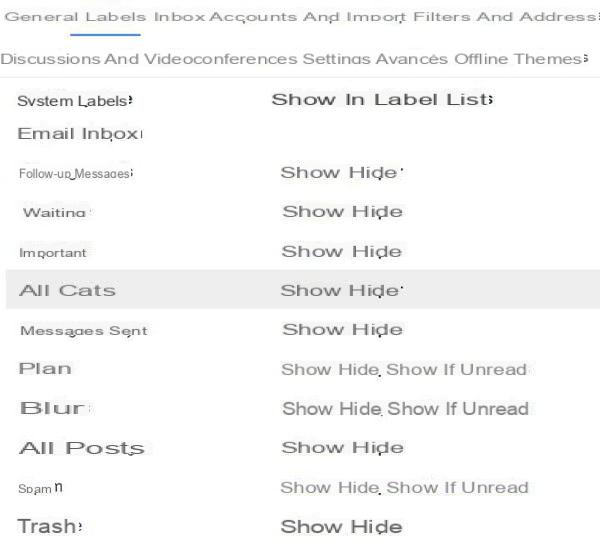
- Note that this setting is only available in the web version of Gmail. It is not possible to change the display of system labels in the mobile application.
How to organize messages by categories in Gmail on computer?
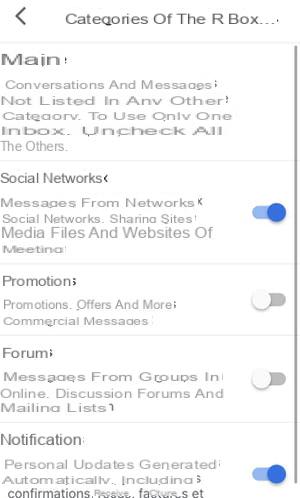
Gmail's category system allows you to segment your inbox into different sections divided into tabs or add specific labels. The webmail offers five categories, four of which are optional. Unfortunately, it is not possible to create new ones. These categories are:
- Primary: this is the only mandatory category. It contains all the messages received if no other category is activated. If necessary, it will contain messages that do not correspond to any of the other categories.
- Social networks: here are messages from social networks (Twitter, Facebook, LinkedIn, etc.), sharing sites, dating sites, etc.
- Promotions: Rather powerful, Gmail's filtering engine easily detects commercial emails and advertisements. They automatically come to order here.
- Notifications: this is one of the most popular categories since it groups together automatically generated messages such as order confirmation emails, invoices, etc.
- Forums: This last category includes all messages from forums, online groups or mailing lists.
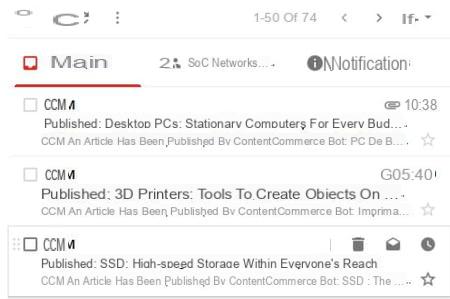
It is possible to use these categories both as separate inboxes (they are then displayed as tabs of different colors in the main page of Gmail) or as simple labels that take place in the left pane of webmail . The two display modes can also be used simultaneously. Finally, if the distribution of messages by category is done automatically by Gmail, it is possible to manually move a message from one category to another or to create an attribution filter (see below).
Show categories in separate tabs
- Open gmail in your browser.
- In the Gmail interface, click on the icon of Parameters (the gear) top right.
- In the Quick Setup panel that appears, click Show all settings.
- Click on the tab Mailbox in the settings page.
- In the Categories section, check the ones you want to display or uncheck the ones you want to hide.
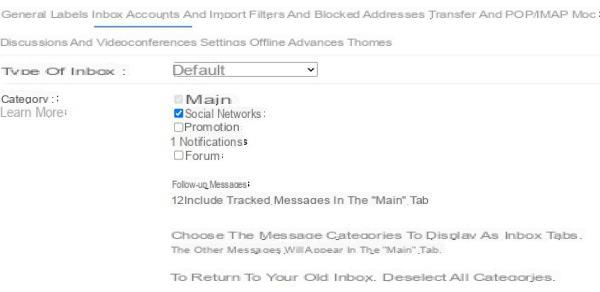
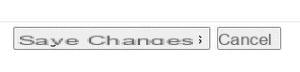
- Scroll down the page and click the button Save Changes.
- Inbox tabs will then appear on the main window.
Display categories as labels
- Open the page again Parameters and click on the Labels tab.
- Scroll down to the Categories section.
- Two columns are available for category labels: Show in the list of labels and Show in the list of messages.
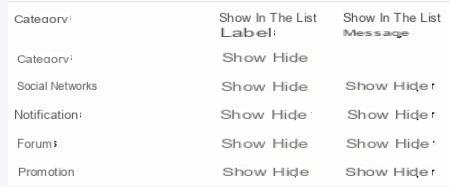
- In the Display column in the list of labels, activate Show ou Gogglesr for each category (the black color indicates that the state is active). You can display all categories by clicking on Show in the Categories line. The category labels will then automatically appear in the right column.
- Do the same in the Show column in the message list. With this option, the caption will be displayed directly to the left of the subject of a message in the inbox.
- In both cases, you can then find all the messages associated with a label by clicking on it (either in the menu or in the title of the email).
- Note that changes made to the desktop version of webmail are automatically reflected in the mobile application.
How to organize messages by personal labels in Gmail on computer?
The categories set by Google are a good start but aren't enough to neatly tidy up the emails that pile up in your inbox. You must therefore use your own labeling system to, for example, identify and easily find mail from an administration, your bank, a colleague, etc. It is arguably the most powerful and useful filing tool in Gmail. Here's how to create and use them.
- In the Gmail interface, click on the icon of Parameters (symbolized by a cog) at the top right of the window.
- In the Quick Setup panel that appears, click Show all settings.
- Open the Labels tab and scroll down to the Labels section at the bottom of the page.
- Click on the button New wording.

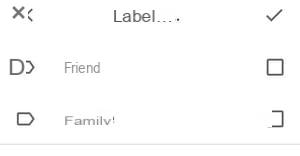
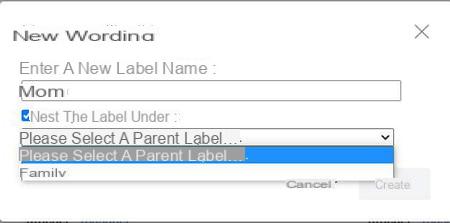
- In the creation window, enter the name of the label in the first field.
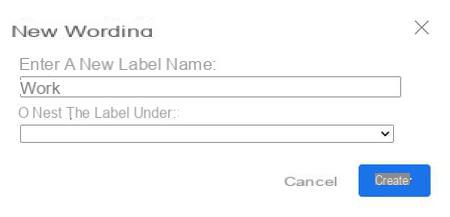
- It is possible to affiliate the new label to another previously created. To do this, check the Nest label under box and choose the parent label from the drop-down menu.
- Then click Create.
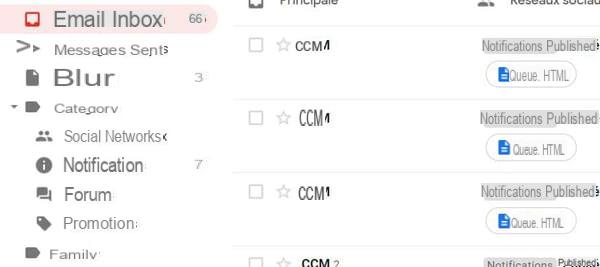
- The label you just added is displayed in the left pane of the general Gmail interface.
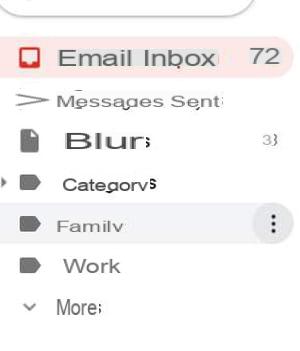
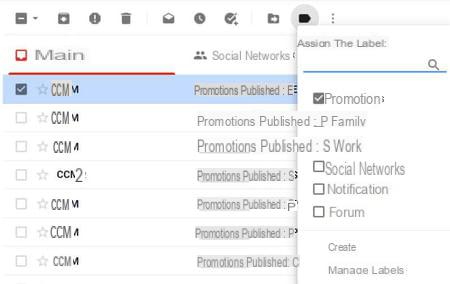
- Pass the mouse pointer over it and click on icon with three dots to display the contextual menu of options.
- From this menu, you can assign a color to the label but also have it displayed in the list of labels in the left menu and in the label of messages in the list. You can also delete and modify a label or create a sub-label.
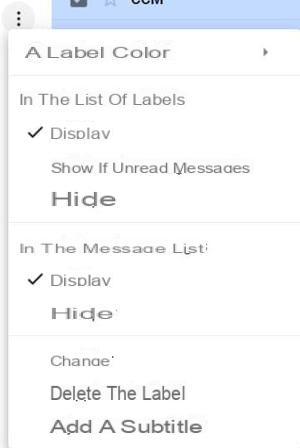
- Note that you can also configure the display from the list of Labels in the Labels tab of Parameters.
- To classify a received message with a label, first select it in the list of received messages. In the toolbar above the messages, click on the icon Labels (the one in the form of a label), then select the label to apply from the contextual menu.
- Again, you can automatically add a label to incoming messages using a filter system.
How to create a filter to classify messages in Gmail on computer?
To avoid having to manually classify all your messages, you can create a sort filter that will apply to all incoming messages (even those already received) that match certain criteria. For example, to classify all messages from colleagues under a Work label. There is a very easy way to create filters in the computer version of Gmail.
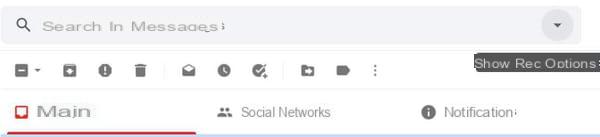
- In Gmail, click the little triangle to the right of the search field to display the search options window.
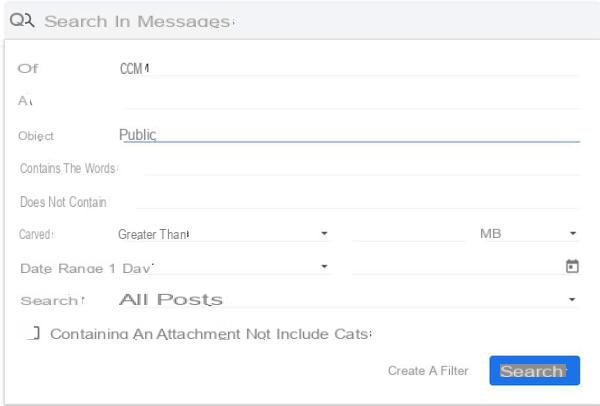
- In this window, complete the search fields according to the filter you want to create. For example, if you want to filter all messages from a specific email address, type or paste that address in the field De. If you want to filter all messages with the same word or phrase in the subject, enter them in the field Object, etc. You can of course combine several criteria.
- Once the fields have been completed, click on the button Create a filter to the left of the button Search.
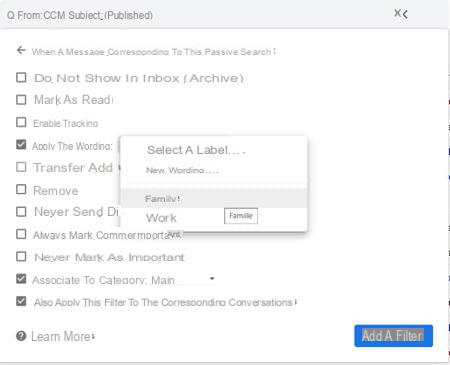
- In the new window that appears, you will be able to configure the actions of the filter. For example, to automatically apply a label to the messages listed according to your criteria, check the box Apply label then select a label from the drop-down menu.
- To automatically apply a category, check the box Associate with the categorye and select the category from the drop-down menu
- Check the box Also apply this filter to the corresponding conversations if you want to apply the filter to messages already received.
- Click on Create a filter to finalize the operation.
- Thanks to this filter, all the incoming messages corresponding to the criteria will be attached to the caption and or to the category. The filters created are automatically found in the Gmail mobile application. Fortunately, since it is not possible to create filters from it.
How do I organize messages by categories in the Gmail mobile app?
If you have chosen to split your inbox into several categories in Gmail on your computer (Main, Promotions, Notifications, etc.), this mode is also applied in the mobile application. However, you can create or modify this ranking from the Android or iOS mobile application.
- Open the app gmail on your smartphone or tablet.
- Open the Gmail menu by pressing icon with three horizontal bars at the top left of the screen.
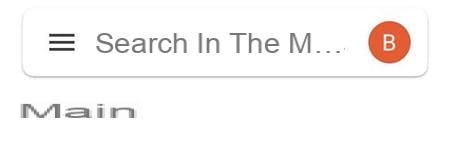
- Scroll down the menu and press Settings.
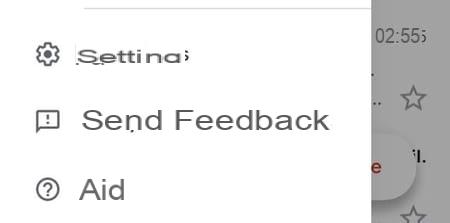
- Select your account on the Settings page.
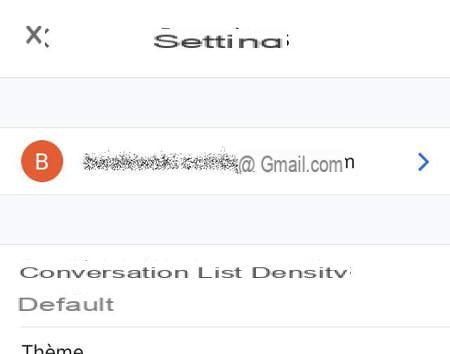
- In the settings of the selected account, go to the Inbox section.
- First press the Inbox type section and select Default inbox.
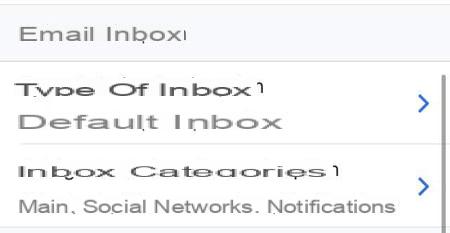
- Then press the item Inbox category and select the categories you want or not to appear.
- The selected categories will then appear at the top of the main menu of the Gmail app.
How to organize messages by personal labels in the Gmail mobile application?
As for the categories, the labels created with the computer version of Gmail are present in the mobile application. Surprisingly, it is not possible to create or edit labels from the Gmail app for Android. On the other hand, the operation is possible with the iOS application, even if the creation of labels remains limited compared to what can be done on a computer.
- Open the app gmail on your iPhone or iPad.
- Open Gmail's main menu by pressing the three horizontal bars at the top left of the screen.
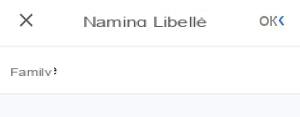
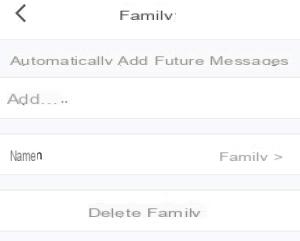
- In the menu that opens, the labels are found after the Recycle Bin. Press the button Create to set up a label.
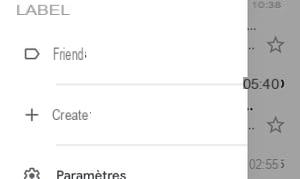
- Enter the name of the label and press OK.
- It is possible to assign filtering functions to this label (again in a more limited way than on the computer version). To do this, open the main menu again and click on Parameters. Then select your Gmail account.
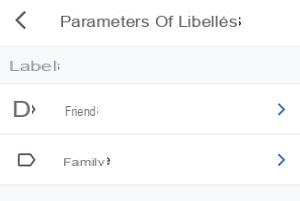
- In the account settings page, scroll to the Labels section and open the section Label settings.
- Then select the label you just created to access its settings page.
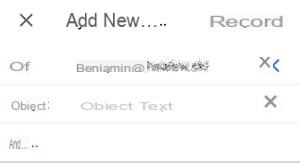
- On the settings page, click Add.
- On the next page, enter a name or an address in the line De, or click De to change the type of filter (À, Object, contains, Does not contain). Click on And.. to display additional filter fields. Once all the criteria are in place, click on Save.
- From the label settings page, you can also modify its name and delete it.
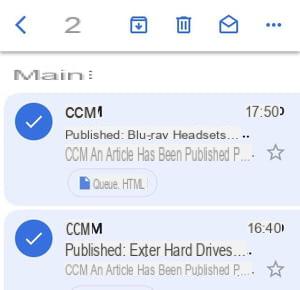
- If the creation of labels on mobile is reserved for iOS, you can of course assign an existing label to emails received both from the Android application and from iOS. Here is how to do it. To do this, in the Gmail application, press the avatar (or letter) identifying the author of the message to the left of it to display a checked box. You can select multiple messages this way.
- Once you have selected the message (s), press the Suspension points at the top right of the screen
- In the pop-up menu, tap Change wording.
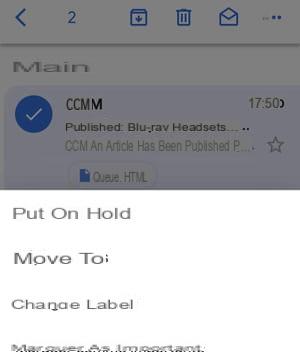
- Choose the desired wording by checking the corresponding box, then validate by pressing thecheck mark icon at the top right of the screen.