


I would like to lighten up my iPhone XS a bit by removing some photos and moving them to an external device, such as a USB stick. I don't want to make a backup that just remains on my computer. How do I copy photos from iphone to USB stick without the risk of deleting them and without having to do complex manual operations?
Thanks to its high-quality camera, users with an iOS device (iPhone or iPad) enjoy taking pictures in every moment of their daily life. Over time, however, the photos (along with the captured video files) become the real cause of insufficient space on the iPhone. Therefore the need arises to have to move and save these photos from iPhone to SD card or to computer or to one USB pendrive. The USB stick is perhaps the best external device to use because all the photos that are copied to it can then be viewed by your computer, smart TV or other portable devices.
Actually Apple doesn't offer a solution to transfer photos from iPhone / iPad to USB stick. Fortunately, however, there are several alternative routes that you can try. Below are the three solutions we propose to move / copy photos from iPhone to USB stick.
- Method 1. Transfer photos from iPhone / iPad to USB stick on PC / Mac with 1 Click
- Method 2. Transfer photos from iPhone / iPad to USB stick manually on Windows
- Method 3. Transfer photos from iPhone / iPad to USB stick manually on Mac
Method 1. Transfer photos from iPhone / iPad to USB stick on PC / Mac with 1 Click
Those who own an Android mobile phone (eg Samsung Galaxy, Huawei, etc. ..) are certainly more advantaged because the Android system allows different ways to copy photos from the mobile phone to a PC or other USB memory devices. However, even those who own a iPhone / iPad it has some solutions that it can adopt for the same purpose.
Compared to the more complicated steps that we will see in the following two solutions, this method is much simpler and has no limits. This solution is to use TunesGO, a software with which you can transfer, with a click, the photos from iPhone iPad to your USB stick, to your computer or any other mobile phone. Here are the highlights that should lead you to use this program.
- Time savings: 1 click and 43 seconds to transfer over 3000 photos from iPhone to your pendrive
- No quality loss: Maintains the original quality of the photos, no compression or modification occurs during the transfer.
- No limit on photo types. You can transfer all kinds of photos and albums from your iPhone: Camera Roll, iCloud Photo Library, LivePhoto, Panoramas, Screenshots, Shared Photos, Whatsapp Photos, Selfies, etc ...
- Not just photos: In addition to photos, with TunesGO you can manage and transfer almost all the contents of your iPhone / iPad such as videos, music, contacts, messages, books, apps, and so on.
First download and install the program on your Windows or MacOS PC from the links below


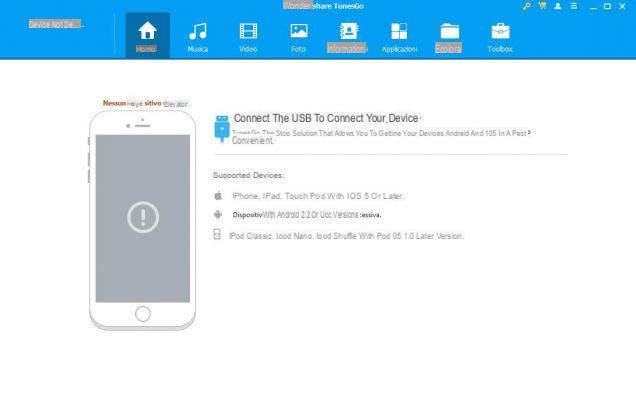
Once the program is installed and started you will see the following initial screen:
At this point, follow these simple steps to start copying photos from iPhone / iPad to USB stick
Step 1: Connect your iPhone / iPad and your USB stick to the computer
After opening TunesGO, connect the iOS device to the computer via its original USB cable. Once the device is detected by the program you will see its image on the home screen:

Also connect the key to your computer, to another USB port and make sure it is detected correctly.
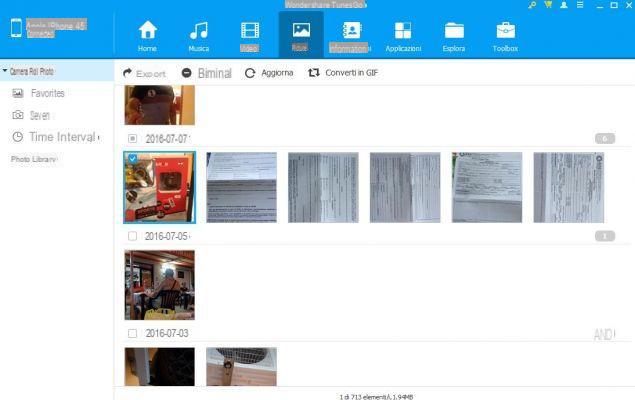
Step 2: Select the photos to transfer
From the menu at the top of TunesGO click on PHOTO. A screen will open with all the photos on your iphone / ipad. From this window you can easily select all the photos you want to copy on the stick because they are divided by date and type (album, camera, selfie, panoramas, etc. ..).
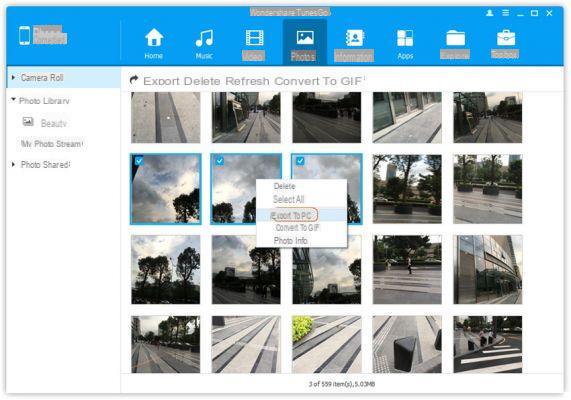
Step 3: Copy photos to the stick
Once you have selected the desired photos, click on the EXPORT button at the top and then EXPORT TO PC. A window will open where you can go to select the destination folder. In our case you can set the USB stick as the output folder. Once this is done, proceed with copying the photos on the stick.
Method 2. Transfer photos from iPhone / iPad to USB stick on Windows
For Windows users, you can do some manual steps to transfer photos from iPhone / iPad to USB stick. With this method you will be able to copy the camera roll photos of your iPhone but if you have enabled the iCloud Photo Library on your iPhone you will not be able to make such a copy. If you want to transfer or export all iPhone photos without limits we recommend method 1 above.
Step 1: Connect the iPhone or iPad to the PC
Connect your iOS device to Windows computer via USB cable. If it is detected as an external portable device you will be able to open the folder related to your iPhone / iPad.
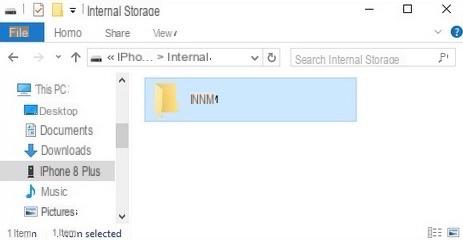
Step 2: Access the folder "DCIM".
Among the many folders you will see there is one that is called "DCIM". In this folder are the photos.
Step 3: Copy photos to the stick
Insert your USB stick and make sure it has enough space for all the photos you want to transfer. Then choose the photos you want to transfer from the “DCIM” folder of your iPhone and copy and paste or drag them to the folder on your pendrive.
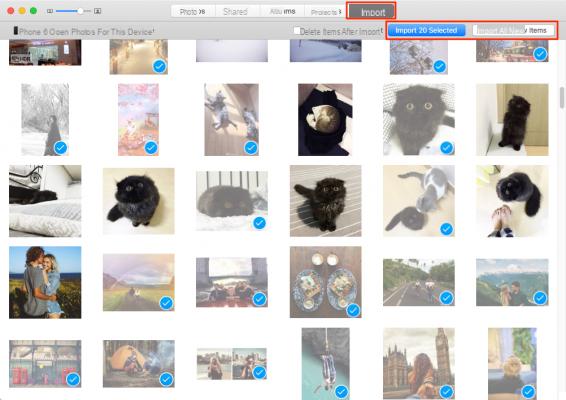
Method 3. Transfer photos from iPhone / iPad to USB stick on Mac
For Mac users, the Gallery it can be a good option to export photos from iPhone to USB stick. However, you have to keep in mind that this app supports transferring photos from camera roll from iPhone to Mac. Other types of photos like iCloud photo sharing, photos synced with iTunes cannot be exported to your Mac and therefore not even to the stick. connected to the Mac.
If you want to transfer all photos to your iPhone, Method 1 is the best one. Here are the detailed steps to follow for transfer photos from iPhone to USB stick on Mac:
1 phase: Connect iPhone to your Mac
Connect your iPhone to Mac via a USB cable. Make sure you have the latest version of iTunes installed on your Mac.
2 phase: Transfer photos from iPhone to Mac
On your Mac, the Photos app will automatically open. If not, open the Photos app> Click the "Import" tab> Select the photos you want to export, then click "Import selected" or click "Import all new photos" to transfer all your photos .
Step 3: Copy photos to the stick
Finally connect the key to your Mac, choose the photos you want to copy and paste them in the folder of the connected key. Done!
Copy Photos from iPhone / iPad to USB Flash Drive -


