


How to connect a webcam to a desktop PC
Contrary to what you might think, connect a webcam to the desktop PC it is a far from complicated operation. To begin with, remove the webcam from its packaging, take the USB connector placed on it and insert it in one of the USB ports free of the computer.
Now, depending on the model of webcam you have and the version of the operating system you are using, two things can happen: at best, the webcam will be automatically recognized from the operating system, without the need to install anything, and can be immediately used within the various programs that request it. In such cases, you should see a notification message indicating the successful installation of the connected device.
If automatic recognition is not successful, you must proceed with themanual installation of device driver, ie the “program” that allows the two devices to communicate.
To be able to do this, take the CD received with the webcam, insert it into your computer player and wait for the driver installation file to run automatically. If this does not happen, start theFile Explorer / Windows Explorer Windows, by clicking on the icon depicting a gialla poster located in the system tray, click on the icon PC / Computer question resident in the left sidebar, double-click the icon CD-ROM and manually run the driver installation file, which may have a name similar to install.exe, setup.exe o install.exe.
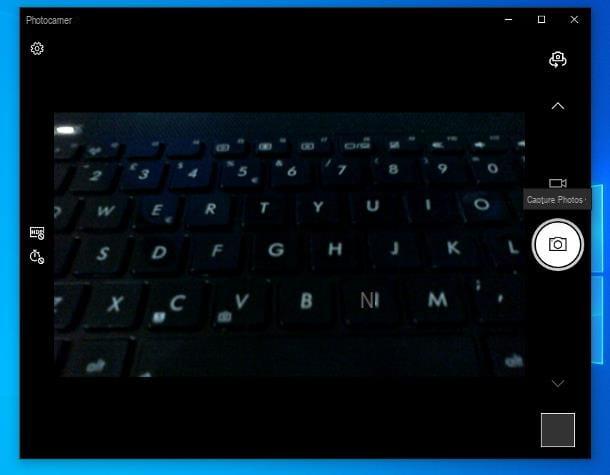
After this step too, complete the installation of the drivers by following the instructions that are provided to you: in general, it all boils down to clicking on the button several times Forward / Next and then Install / Install and wait for the necessary files to be copied to disk. At the end of the installation, if requested, restart the computer, connect the webcam again and start one of the programs that use it (eg. Windows 10 camera): with a bit of luck, the device should be correctly recognized and be immediately usable .
How to connect a webcam to your PC without a CD
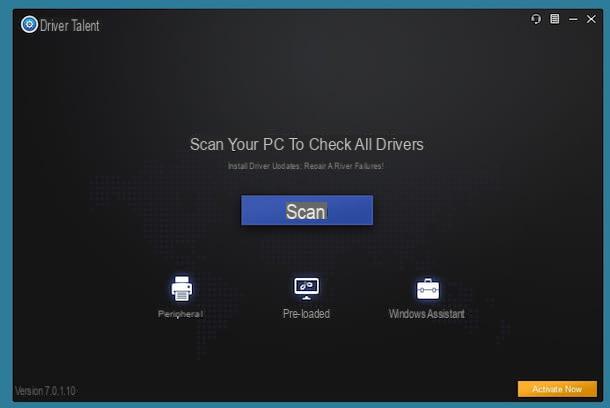
If you do not have the CD containing the webcam drivers or, again, you have a computer without a CD player, you can easily remedy the problem by downloading the necessary files from the manufacturer's website, precisely from the section Download o Support / Support or, again, by searching on Google for phrases like download driver [webcam brand and model].
Before proceeding with the download and installation of anything, I recommend that you check thetrustworthiness of the site from which you are about to download the material, in order to avoid running into files that are not suitable for the webcam in your possession or, even worse, malware. Personally, I advise you to always prefer the material available on the websites of the device manufacturers.
How to connect a webcam to the laptop
The steps to take for connect a webcam to the laptop are not at all unlike those already seen for desktop computers: even in this case, all you have to do is enter the USB connector of the webcam into the specific connection port located on the laptop and, subsequently, proceed with the installation of the drivers using the disk supplied, or the specific setup file downloaded from the Internet.
If the amount of USB ports on your notebook is not sufficient to cover the insertion of an additional webcam, I recommend that you consider purchasing a USB hub, able to "get" multiple ports from a single connector.
Most notebooks, however, already integrate a "digital video camera" directly on top of the display that will almost certainly be used, by default, by the operating system and installed programs, even though you have set up another one. To alter this behavior and make the choice fall instead on the "external" webcam, in most cases, you have to act within the program or application that makes use of it.
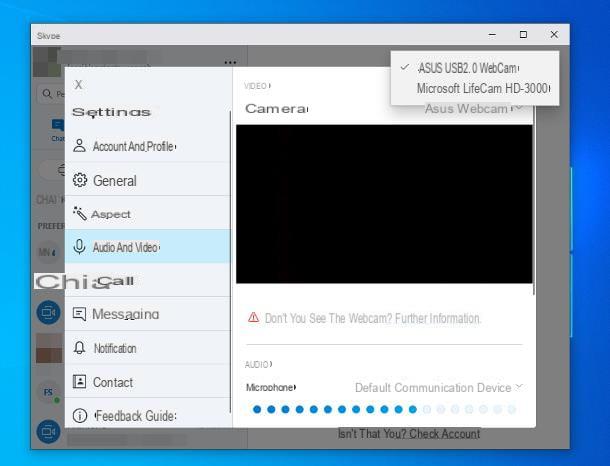
On Skype, for example, you can select a webcam instead of the other in the following way: after starting the software and logging in, click on the button (...) located at the top (next to your name), select the item Settings from the menu displayed on the screen and go to the section Audio and video, located on the left sidebar. Finally, use the drop-down menu next to the wording Video camera to select the device to use during conferences.
In the application Windows 10 camerainstead, you can get the same result by clicking on the button Change camera, located at the top right.
Where the program of your interest does not provide for the possibility of choice or, again, if the webcam integrated into the computer is broken and you want to permanently disable it, thus "forcing" the operating system and programs to use the external one, you must act from the section Device management of Windows.
To access it, if you employ Windows 10, right click on the Start button (the button in the shape of pennant located in the lower left corner of the screen) and select the item Device management from the menu that is proposed to you. If, on the other hand, you are using an older version of Windows, open the menu or the Start screen, type the words "device management" in the search field and click on the first proposed result.
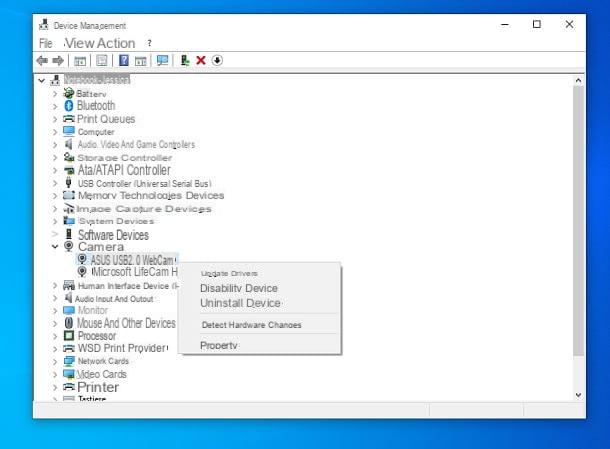
Once in the Device Manager screen, expand the item Cameras, right click on the name of the webcam to be disabled (eg. ASUS USB2.0 WebCam), click on your voice Disable device placed in the contextual menu displayed and then press the button Yes, to confirm the will to proceed: starting from this moment, the integrated webcam will no longer be visible to the programs or to the operating system and, automatically, priority will be given to the external one.
In case of second thoughts, you can activate the integrated camera again, repeating the steps seen above and selecting, this time, the item Enable device.
How to connect a webcam to the Mac
If you don't have a PC with a Windows operating system but a Mac, generally, the driver problem does not arise, since everything you need is already present in macOS: all you have to do is insert the USB cable of the webcam into the port of the same name located on the computer and wait for the computer to automatically recognize the device and make it available within the various applications.
If you have a Mac equipped with sun USB-C port and the webcam in your possession is equipped with a standard USB connector, you will have to connect the devices using a special one Adattatore or hub gives USB-C to USB-A.
Generally no additional configuration is required, but in the event that, for some reason, automatic recognition should fail, I suggest you go to the the manufacturer's website of the device, precisely in the area dedicated to support or to download for free, and look for the package containing the Mac driver dedicated to the webcam model in your possession.
After downloading the setup file, launch it and follow the on-screen instructions to proceed with the installation of the necessary components - usually, it all comes down to pressing the button Continue and the insertion, when requested, of the Password from the Mac.
How do you say? Your Mac is already equipped with a FaceTime HD, FaceTime or iSight camera and, instead of the latter, would you like to use the newly installed cam? Fear not, this is entirely feasible: as I explained to you in my tutorial dedicated to recording movies with the Mac webcam, most programs developed for macOS allow you to select the video capture device to use, usually via a menu. drop-down or a specific item in the application settings.
How to connect a webcam to the PC


