After creating a PDF file you may need to insert images or photos into it to make it even more complete. In this article we see how to use Adobe Acrobat to insert images into a PDF file. If you do not have Adobe Acrobat and have no intention of purchasing it, we propose to use a program PDF Editor definitely cheaper than it also allows you to insert images into a PDF file.
Solution 1. Insert Images into PDF with Adobe Acrobat X Pro
Open the PDF file where you want to add an image using Adobe Acrobat X Professional. Go to Tools> Comments & Markup, and select "Stamp". Then click on "Create custom stamp".
Press the "Choose" button to load the image you want to insert into the PDF. In the “Show” drop-down menu, select the image format. Then select the target image and click on "Ok".
This image is considered as a "stamp" or "stamp" to be added to the PDF. This is why it is necessary to operate in the “My Stamps” category. Go to the My Stamp category and type a name for the image you need and click "OK".
Go to Tools, go to the Comments and Markings> Stamps> My Stamps section, select the image. You will now be able to see the image inserted in the PDF. Move the cursor to the place just where you want to put the image. The image will be inserted.
Click on the image to bring up the blue border and you can drag those borders to resize the image.
Solution 2. Using PDFElement to insert images into PDF files
Step 1. Download PDFElement
If you have a Windows PC download the version PDFElement per Windows. For Mac users there is the version PDFElement per Mac which is fine for iMac, MacBook Pro or MacBook Air. After downloading, install and run the software.


Step 2. Insert images into the PDF
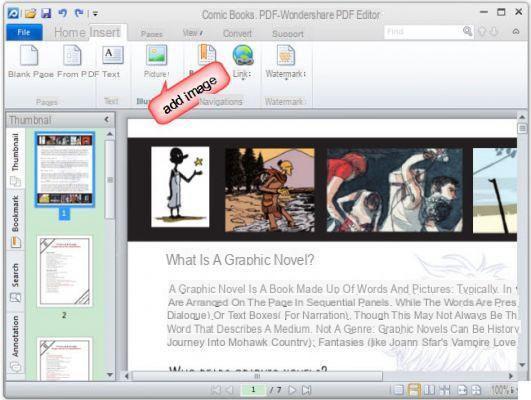
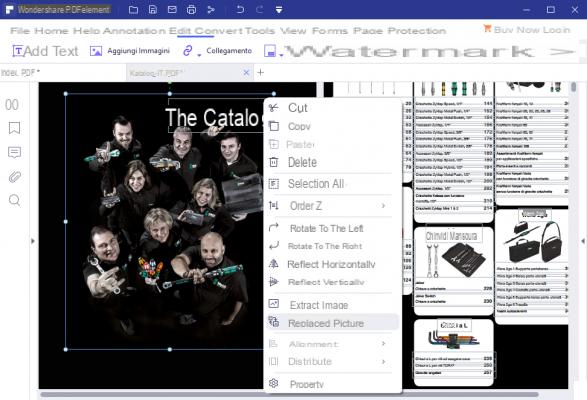
Click on the quick launch icon on the desktop to launch PDFElement and open the PDF file where you want to insert the image. On Windows, click on the top menu MODIFICATION and then on the icon ADD IMAGE to select the image from the PC and insert it into the PDF.
On Mac the process is pretty much the same and you can insert any image from your computer into the PDF.
Step 3. Edit inserted image
Click the inserted image to bring up blue borders. Now you can move the mouse to place the image in the right position and adjust the image size. When everything is OK, save the PDF file to your computer.
This is the simplest way to insert an image into a PDF document. That's a lot easier than doing it with Adobe Acrobat X, right? Seeing is believing!
![[iPhone] iMessage Doesn't Work: No Messages Are Received | iphonexpertise - Official Site](/images/posts/6b02db17523b3c290f81b739e105ae3c-0.jpg)