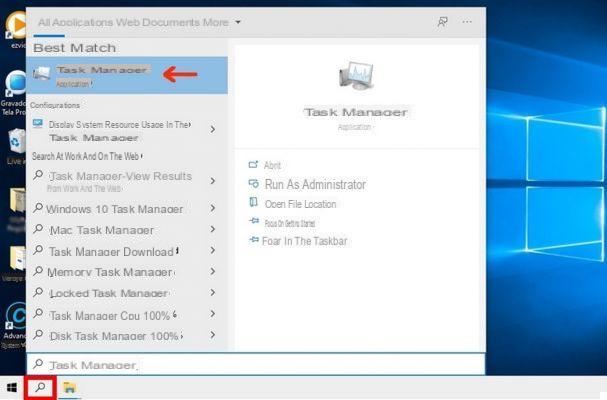
If yours PC Windows 10 suddenly appears slower and more cumbersome, even in the most basic operations it is very likely that there is an "overload" of disk or CPU usage. We've already covered the topic of 100% CPU and seen what to do in that case. Here instead we want to examine the problem of100% disk usage on Windows 10. First of all, to verify that there is this problem, click on CTRL + ALT + DEL to access "Activity Management". If you see 100% disk usage here, as in the image above, then this is the cause of your Windows 10 PC's slowness. There are several possible solutions:
- Disable Windows 10 Search
- Disable SuperFetch service
- Make a disk check
- Reset Virtual Memory
- Temporarily disable Antivirus
- Change Chrome & Skype settings
- Repair StorAHCI.sys driver
- Update PC drivers
Solution 1: Disable Windows Search
Windows Search is that service integrated in Windows that allows you to search for files on your PC in a faster way. If you don't use this service you have another search app, you can disable it completely. Disabling this service will stop indexing all files. But you will still have the search function only it will take longer.
that's how temporarily disable Windows Search and find out if this is the cause of the high 100% disk usage. (Please note that Windows Search will restart when you restart your computer.)
1) On the keyboard, press the del key Windows logo and key X at the same time and then select Windows PowerShell (administrator).
2) A blue window will open where you can enter commands. In our case, the command to enter to temporarily disable the Windows Search function is this:
net.exe stop "Windows search"
3) Then click on Submit to confirm the command
You will see a window like the one pictured above. At this point, check the "Task Manager" window again to see if thedisk usage still goes 100% or not.
If you find that Windows Search is the cause of high disk usage then you should definitely disable it. to do this, follow these steps:
Press the keys Windows + R logo and write services.msc.
2) Look for the option Windows Search double click and enter the window Property.
3) Change the type of Start like Disabled. Finally click Apply e OK per salvare I modified it.
4) If you have solved the disk problem 100%, return to the Task Manager screen and you should see very low values, or even 0%
Solution 2: Disable SuperFetch
SuperFetch helps reduce startup time and make program loading more efficient. However, it has been identified as a potential cause of disk performance issues in Windows 8 and later, including Windows 10. Here's how to stop this service:
1) On the keyboard, press the del key Windows logo and key X at the same time and then select Windows PowerShell (administrator).
2) A blue window will open where you can enter commands. In our case, the command to enter to deactivate the Superfech is this:
net.exe stop superfetch
3) Awards Submit on the keyboard
4) Wait a few minutes to see if the computer starts working better. Or check the disk usage from the “task manager” by seeing in the Processes tab, the% at the top of the column disc. If it is no longer 100%, you have solved the problem!
If the 100% disk usage problem persists, try the next method, below.
Solution 3: Disk check
1) On the keyboard, press the del key Windows logo and key X at the same time and then select Windows PowerShell (administrator).
2) Write this command:
chkdsk.exe / f / r
3) Awards Submit on the keyboard and confirm the start of the “disk check” function. Make sure you have closed all open apps before doing this.
IMPORTANT: The disk check will start the first time you restart your PC and may take quite a while (sometimes up to 810 hours). If upon reboot, you cannot wait for the disk check to complete, you can skip it. You can of course reschedule it.
4) Once the disk check is complete try to reuse the computer and try to figure out if the disk usage percentage remains below 100%.
Solution 4: Reset Virtual Memory
Virtual memory can be considered an extension of your computer's physical memory. It's a combination of RAM and a part of your hard drive. When there is not enough RAM to perform a task, Windows will temporarily store files in virtual memory, and then put them back into RAM if required.
To restore virtual memory:
1) From the keyboard press key Windows logo e Pause together. Select Advanced system settings
2) Go to the tab Advanced and click Settings.
3) Go back to the "Advanced" tab and select the "Change ..." in the virtual memory section
4) Make sure the box Automatically manage paging files is not selected.
5) Select the Windows drive, hard drive or partition where Windows is installed, usually C: and enter "Initial size" and "Maximum size" for your virtual memory:
- Initial dimensions: This value varies depending on the computer. If you are not sure which value to use, enter the number in the Recommended category.
- Maximum size: Do not set this value too high. It should be approximately 1,5 times the size of the physical RAM. for example: a PC with 4GB (4096MB) of RAM should have no more than approximately 6.144MB of virtual memory (4096MB x 1,5).
After entering the virtual memory values, click Tax and then click OK to continue.
6) Now delete all the 'temp' files on your computer. On your keyboard, press the Windows key and R at the same time, and then into the form Run finger temp I awarded Submit. This will open Windows Explorer with the Temp folder open, showing all the temporary files on your computer.
7) Select all files and delete them
8) Now try to use the computer and check if the disk usage reaches 100% again or not.
Solution # 5: Temporarily disable the antivirus
If you have installed anti-virus or anti-malware programs such as Norton, Kaspersky, AVG, Avast Behavior Shield, or Malwarebytes, you need to temporarily disable or disable them to see if they cause disk usage problems.
You must know that Microsoft also has its default antimalware ie Windows Defender. It is automatically enabled even if other antivirus applications are installed. Even if you disable your other antivirus programs, Windows Defender is always active there and therefore your computer remains protected even if you disable the other antiviruses. In some cases, even Windows Defender could cause slowdown problems on Windows 10, and so we also recommend that you try to disable Windows Defender to rule it out as the cause.
Solution 6: Change Chrome and Skype settings
Often on Windows 10, the combination of Google Chrome and Skype it can cause 100% disk problem. To resolve this conflict, you need to change some settings. Here's what to do.
1) On Google Chrome click on the three dots at the top right and then choose "Settings"
2) Go down until you click on the writing Advanced.
3) In the category Privacy and Security, make sure that the option "Use predictive service to load pages " is deactivated
4) Make sure Skype is not open
5) In Windows Explorer go to C: Program Files (x86) SkypePhone.
6) Right click on the file Skype.exe and select Property Properties.
7) Go in Safety and select "edit"
8) Click ALL APPLICATION PACKAGES and select box allow su Writing. Confirm by clicking Apply and OK
9) Now try to use the computer and check if the disk usage percentage of Windows 10 still peaks at 100% or not.
Solution 7: Repair StorAHCI.sys driver
Most often the 100% disk problem on Windows 10 is caused by driver corruption StorAHCI.sys.
Here's how to fix it.
1) Open Device management after clicking Windows logo and key X
2) Expand the category IDE ATA / ATAPI Controllers and double click on AHCI controller.
3) Go to the tab driver and click Driver Details. If you see storahci.sys stored in the system32 folder then the “inbox AHCI” function is running.
4) Close the driver details window and go to the "Details" tab. From the drop-down menu select Device Instance Path. Below check that the folder starts with VEN_
5) Write regedit in the search box from the menu Home Windows and click Enter. Now look for this directory:
HKEY_LOCAL_MACHINESystemCurrentControlSetEnumPCI DeviceParametersInterrupt ManagementMessageSignaledInterruptProperties
The value refers to the name you saw in point 2)
The value it is different for each machine
6) Double click on MSISupported and set the value to 0. Click OK to confirm.
7) Restart your computer and then use it to see if the disk problem is 100% resolved or not.
Solution 8: Update PC Driver
If the above steps don't fix the 100% disk usage in Windows 10, then you just have to check the operation of all the PC drivers.
It's possible automatically update all drivers of the device to the latest version with Driver Easy.
Driver Easy it automatically recognizes your system and finds the correct drivers for it. You can update your drivers automatically with the FREE or Pro version of Driver Easy. But with the Pro version it only takes 2 clicks (and you get full support and a 30-day money back guarantee):
For more info read the following guide: how to update pc driver automatically
In addition to updating the drivers, it would also be recommended to do a good cleaning of the computer, removing all junk files and useless programs which, if running, will certainly increase the percentage of the disk in use. In this regard, we recommend using the program Wise Care 365, one of the best PC cleaning programs.


