Do you like to end your messages with your name, contact details, a polite phrase or a logo? Use Gmail automatic signatures to save time and not re-enter everything every time!
Like many, you may be used to ending your emails with a section that includes, for example, a polite phrase, your first and last name, your contact details, your function, a slogan, a saying, a photo or a logo, depending on whether you write to relatives, colleagues, business contacts or the administration. In this case, it is in your interest to make it a signature that will be automatically integrated into your messages to avoid having to manually enter this information each time.
Good news: Gmail has a special feature for this! Google e-mail even allows you to create and use several personalized signatures - personal, professional, administrative, etc. - and choose which one to include when composing a message. So much time saved every day. This very practical function is available in all versions of Gmail - Web for computer, mobile for Android and iOS - with a few nuances: on the one hand, only the version for computers can manage several signatures; on the other, if you define a "default" signature - that is to say integrated systematically into each message - on the computer version, it will also be automatically used in the mobile application, unless you create a signature dedicated for the application!
How do I create a signature in the web version of Gmail?
- Open Gmail in your web browser and sign in to your account.
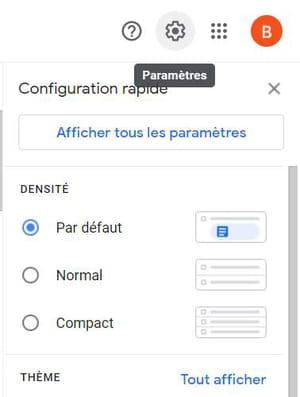
- Click on the icon Parameters symbolized by a cog, at the top right of the window.
- In the Quick Setup panel that appears, click Show all settings.
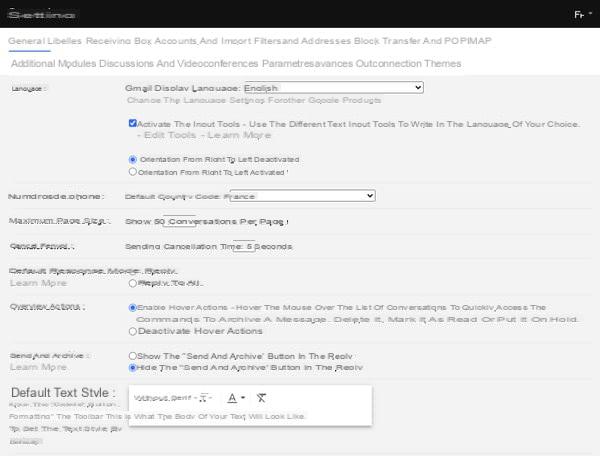
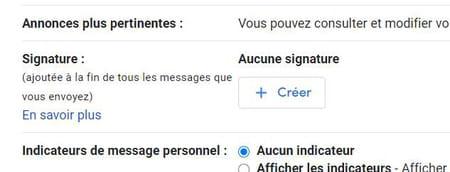
- The Settings page appears. Click the General tab if it is not open by default, then scroll down the page to reach the Signature section.
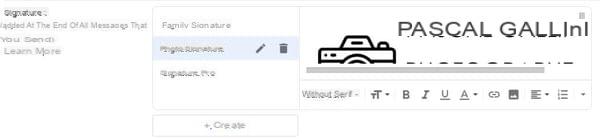
- In the Signature section, click on the button + Create.
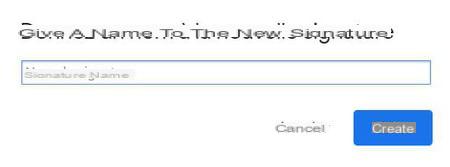
- In the mini window which is displayed in superimposition, enter a clear name for your signature (for example, Pro, Personal, Family…) then press Create.
- Then personalize your signature using the formatting bar from Gmail: like in a word processor, you can choose the font, change the size, change to bold, italics, insert a link or an image, etc.

- If you want to create other personalized signatures (for work, for your loved ones, etc.), click the button again Create and repeat the previous steps. They will be added to the list, along with their name.
- To delete a signature, click on the icon Basket next to their name in the list.
- To modify your signature, click on the icon stylo next to their name in the list.
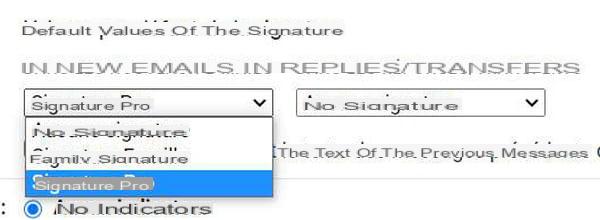
- In the Signature default values section, choose the signature that you want to include by default in new emails and in replies and transfers. It is also possible to choose no signature by default.
- Finally, if you want your signatures to appear without a separator line, check the box next to the Insert signature before text of previous messages option in replies and remove the preceding "-" line.
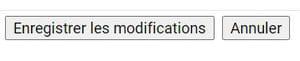
- Once you have created all your signatures, click on the button Save Changes at the very bottom of the screen.
- Your signatures are now available, but you can edit, delete or add them at any time in the same way.
- If you have set a default signature, it will automatically be included in all new messages, including those you send with the mobile app.
How to insert a picture in a signature with the web version of Gmail?
In Gmail you can perfectly personalize your signature with something other than text, by including an image (photo, drawing, logo, pictogram, etc.). You can even only use a signature in image format, if it was made in graphic design software, for example, or if it is a scanned business card.
- In Gmail, click the icon of Parameters at the top right of the window.
- In the Quick Setup panel that appears, click Show all settings.
- Scroll down to the General tab open by default to the Signature section.
- Click on the button Create, enter the name of the signature in the superimposed widget and click again on Create.
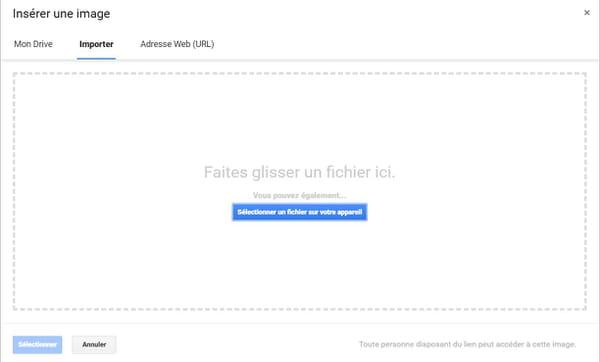
- On the formatting toolbar, click the icon Insert picture.

- Use the insert window to import your image stored on your computer, Google Drive storage, or even from a web address (URL).
- Once the image is imported, it is automatically added to the signature.
- Save the signature by clicking on the button Save Changes at the very bottom of the page.
Note again that if you choose a signature with a default image, it will also be used on the mobile application, unless you have created a specific signature for mobile.
How do I use a signature in the web version of Gmail?
Even if you have saved a default signature, you can easily change it or choose not to use one when composing a message.
- Click on the button New message from Gmail.
- In the toolbar at the bottom of the editor window and to the right of the button Send, click on the icon Signature, quite right.
- From the pop-up menu that appears, select Signature you want to use or choose No signature so as not to display any.
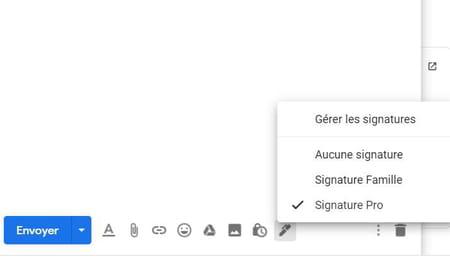
- The signature is immediately inserted into the message. Or deleted if you had defined a default signature and you choose No signature the menu.
How to create a signature with the Gmail mobile application?
With Gmail, it is possible to create a specific signature that will only be used for emails sent from the mobile application. The procedure is simple and identical for Android and iOS. However, unlike the desktop web version, you can only have one signature in the mobile app.
Warning: if you do not define a signature specific to the Gmail application, the default signature used in the Web version will be systematically used for messages from the mobile application.
- Open the Gmail app on your phone or tablet.
- Open the main menu of the application by pressing icon with three sidebars at the top left of the screen.

- Scroll down the menu and open the section Parameters.
- Select the Google account for which you want to add a signature.
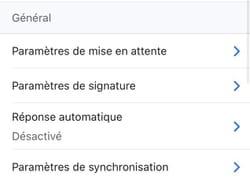
- In the General part, open the section Signature (Android) or Signature settings (IOS).
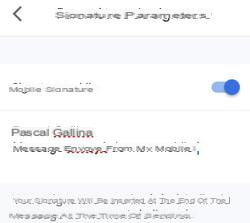
- On Android, enter your signature directly in the mini window that opens, then press the button OK. This time there is no formatting option.
- On iOS, check the Signature switch, enter your signature, then press the back arrow to save.