


Practical sheet: install Windows 7 with a USB key
Operating systems have been released on DVD for several years now. Windows 7, which will be released on October 22 of this year, is no exception. However, this medium is far from being the most powerful and may even be unusable in the case of netbooks, those inexpensive laptops that do not have an optical drive.The USB key can then be an interesting alternative, both for netbooks and for users of traditional machines who will see in this medium a safer, more mobile and above all faster media. So here is a simple method to install Windows 7 from a USB key.
remarks:
- You need a 4 GB key (or memory card) to do this, as the Windows 7 installation files take up about 3 GB of space;
- Microsoft now offers software to facilitate the following procedure. You can download it from our software library:
- Download Windows 7 USB / DVD Download Tool
Step 1: Prepare the source files
The source files are those contained either in the Windows 7 DVD, or in the iso file that you may have downloaded from the Microsoft site. In the first case, this step does not interest you and you can go to step 2. In the case of the iso file, here is how to proceed:
1. Download the Virtual CloneDrive software from our servers and install it. This software will allow you to "mount" your Windows 7 image in a virtual drive. It does not require any restart.
2. Go to the directory where the Windows 7 image is located and select the file in question.
3. Right-click on this file and choose the "Mount with Virtual CloneDrive" entry from the context menu.

Step 2: Prepare your USB key
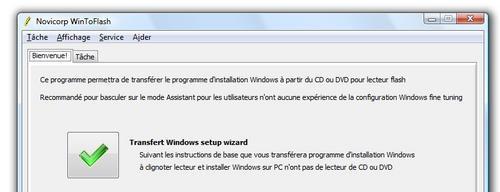
1. Download the WinToFlash software from our servers and install it. Do not be afraid of the terms of use and validate.
2. In the “Service” then “Options” menu, choose the “Language” tab and change the language to Spanish if necessary.
3. The reception offers you the use of a wizard: choose this option, then click on Next.
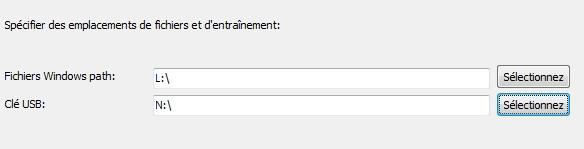
4. In the next step, select the source of the Windows files as well as their destination. Then explore your computer in search of your Windows 7 DVD (or your iso file mounted by Virtual CloneDrive), on the one hand, and your USB key, on the other hand.
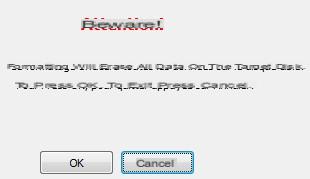
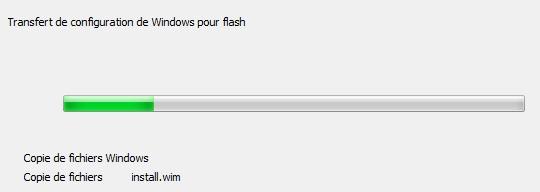
5. Then click on "Next", accept the license of Windows 7 and, after having taken note of the warning which informs you that your key will be formatted, launch the operation. This should take between 10 and 15 minutes, depending on the performance of your USB drive.
Step 3: Boot on your USB key
Your key is now ready! However, it remains to make sure that your computer is able to start on your USB key. To do this, press the F8 key when starting your computer to take advantage of the choice of the boot device. If you plugged in your dongle before turning on your machine, then it should appear in the list. Select it and see the job done! If your BIOS does not offer such a menu, press the "Delete" or "F2" key when starting your machine, and look in the BIOS for a menu containing the word "BOOT". You must then manage to make your USB key appear as the first device. For more information on the subject, do not hesitate to consult our BIOS guide.
Finally, before starting the installation of Windows 7, we recommend that you carefully read our recent article: Windows 7, our advice to prepare for the update. The latter will explain everything you need to know in terms of backing up and updating your operating system.
Appendix: In the event of a problem with Vista
In certain specific cases, it is necessary to prepare your key to accommodate the Windows 7 system files. This procedure is different depending on whether your operating system is Windows Vista or XP. Let's start with the first one. We are going to use the Diskpart utility included in the OS.
1. In the Windows Start menu, do “Run” then type CMD. Validate.
2. In the new window, type "Diskpart" and then press the Enter key.
3. Then type the command “list disk” and validate. If you only have one USB flash drive connected, only one entry should appear. Note the number at the beginning of the line.
4. Then enter "select disk X", where X is the number found in the previous step. Validate.
5. The "clean" command will allow you to clean your key by deleting all the partitions that are there. Enter it and press the Enter key.
6. You must now recreate a partition: enter "create partition primary" and end by validating.
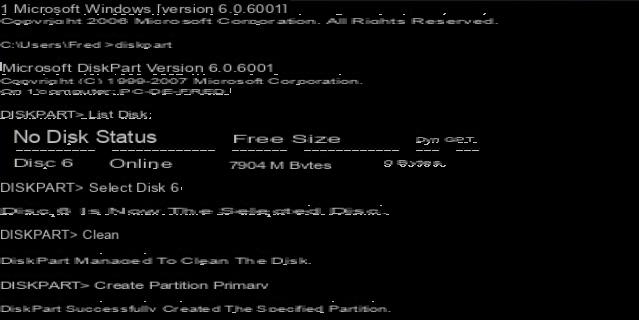
7. Select the newly created partition using the "select partition 1" command. Validate.
8. An important element of this preparation is to make this partition active. Just type "active" and hit the enter key.
9. Format this partition by entering "format fs = ntfs quick" then validating. You can change ntfs to fat32, the quick command saving a few seconds by asking for a quick format.
10. Finally, assign a unit to your USB key with the simple “assign” command. Validate. You can then exit diskpart by typing "Exit" and pressing the Enter key. Your key is ready to accommodate Windows 7 system files.

Annex 2: prepare your key in Windows XP
The diskpart utility is also available in Windows XP, but does not support USB drives. You will therefore have to activate your partition differently. Start by formatting your USB drive:
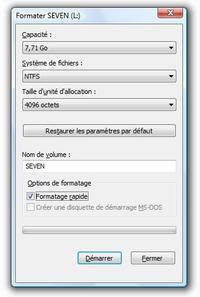
1. In your My Computer, select your key and choose "Format ..." in the contextual menu (right-click).
2. Check the quick format option, give your key a name (here, Seven) and start the procedure.
3. After a few seconds, the operation ends and you can close this window.
You must now use a little software to make your partition active. Here is how to do it:
4. Download the MBRWIZ utility from our software library. Note that there is a 32-bit version and a second for 64-bit system.
5. This software does not require installation. Just put it in an easy-to-access directory, like the desktop.
6. In the Windows Start menu, now do “Run” then type CMD.
7. There, go to the “Desktop” directory using the “cd Desktop” command. Validate.
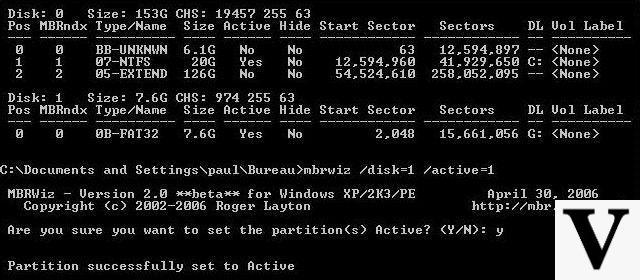
8. Now enter "mbrwiz / list". A list of your disks appears, including your USB key. Note the number indicated after "Disk:" (1 in our case).

9. Enter the command “mbrwiz / disk = X / active = 1” where X is the number noted in the previous step. Validate the operation and answer "Y" to the following question in order to make your partition active. Your key is ready to accommodate Windows 7 system files.
USB stick, better media than DVD for installation?
Installing Windows 7 from a USB key is very practical when using a netbook. But this trick can also have another advantage on machines other than a netbook: that of the speed of installation, because of the use of flash memory. On our test machine, we only took 11 minutes for the whole procedure with our Corsair Flash Voyager GT. We carried out the same procedure using a DVD and the result is final: 31 minutes. The use of a USB key is therefore very advantageous in terms of installation time, but this media also has the merit of not being scratched and of being extremely compact.
To learn more
Here are some articles that you can read will help you progress in the field:- Windows 7: our advice to prepare for the update
- Windows 7: the test
- Tips for getting the most out of your Eee PC
- Netbook comparison: 14 models on the test bench
Download Windows 7 USB / DVD Download Tool for Windows.


