


Do you have beautiful digital photographs that you would like to keep safe, and maybe create a DVD to keep with care? Or do you want to burn some photos taken during your last vacation to DVD to create a kind of movie to watch and share with whoever you want?
Well, in this article you will find the best software solution to burn photos to DVD both for the purpose of "backup" and to create a "slideshow" that is a movie from your photos to be played on DVD disc.
This software solution is called DVD Creator. The name already says that it is a program specially designed for burning files to DVD. In fact it not only allows you to burn video to DVD, but also supports burning images and photos to DVD. These photos can be burned as “data” ie as they are (if you just want to create an archive / backup) or they can be burned to create a real movie. Interesting, right? Read on below to find out how DVD Creator works and how to get both solutions.
# 1. Burn photos to DVD as a "slideshow"
#2. Burn photos to DVD as "data"
# 1. Burn photos to DVD as a "slideshow"
If you want to create a "DVD video”Starting from your photos, to be played and displayed on your TV or any other DVD player, here are the steps to follow.
First download DVD Creator for Windows or macOS from the links below:


On Windows, double click on the downloaded file to start the installation. Click on INSTALL to proceed
After installation you will see the following splash screen:
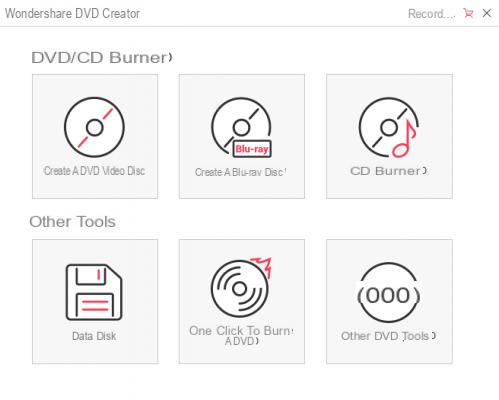
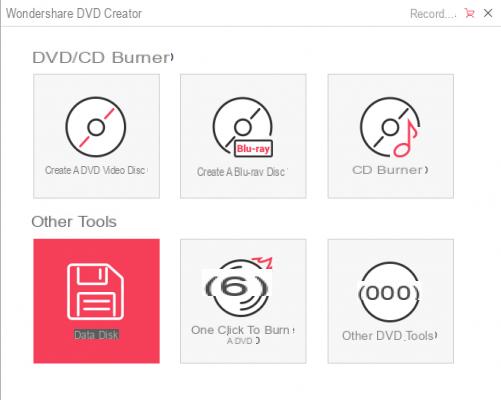
From the main screen you can choose the type of disc to create (DVD, Blu-ray, CD, data disc). In our case you will have to click on CREATE DVD VIDEO DISC and this new screen will open:
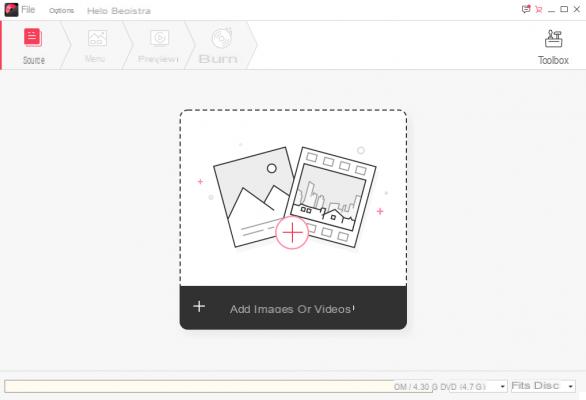
Step 1. Add photos into the program
The first step is to click in the center of the screen to start adding all the photos you want to burn to DVD and with which a real movie will be created (complete with transition effects and special effects).
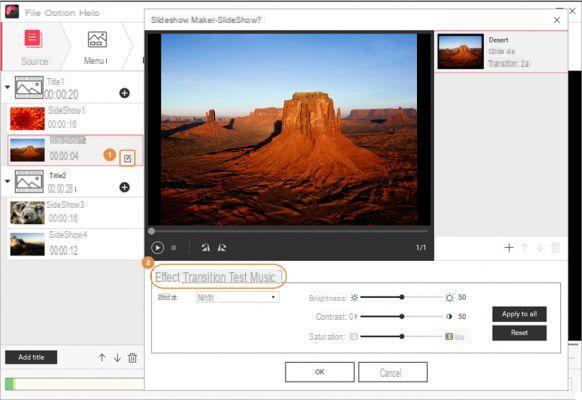
All the photos will then appear on the left of the program. For each of these photos, by clicking on the symbol indicated at number 1 in the figure above, you will be able to access an "edit" window where you can:
> Apply a special effect from those available
> Apply a transition effect from one photo to the next
> Insert an overlay
> Insert background music (to be applied to all photos if necessary for uniformity).
Once you have defined the photos to be burned and made the desired changes, click on "Play" to view the video obtained from their combination.
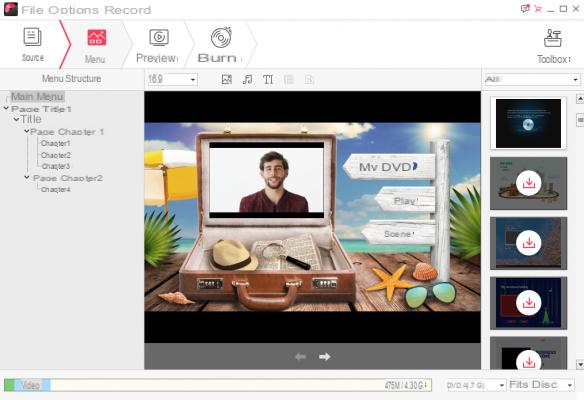
Step 2. Choose a DVD menu
The second step is to set up a menu for the DVD. The menu is the initial screen that appears when the DVD starts and from which you can optionally choose to play from the beginning or from a certain point of the video. In DVD Creator there are dozens of ready-made menu templates that you can use and divided by type (memory, holidays, holidays, classic menus, etc ...)
Step 3. Preview and burn
The last steps are the preview (a sort of preview of the DVD that will be created) and the actual burning
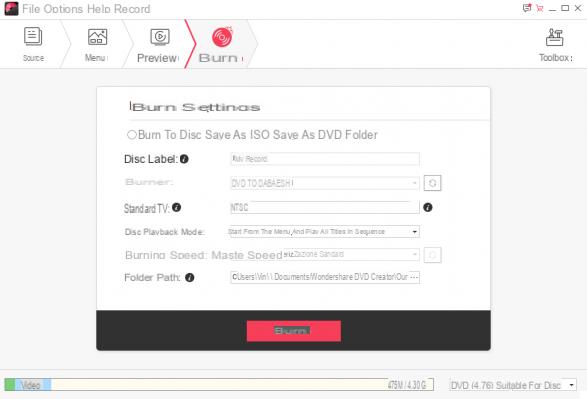
After burning, play the DVD and your photos will come to life !! Try now to burn photos to DVD with this amazing program: the demo version will only add an inscription on the final video.
#2. Burn photos to DVD as "data"
If you want to copy photos to DVD as they are, without creating a photo slideshow, with DVD Creator you can do it without problems. In fact, from the home screen, just click on the "DATA DISK"As shown in the figure below:
A new window will open in which you will need to add all the photos you want to copy to the DVD:
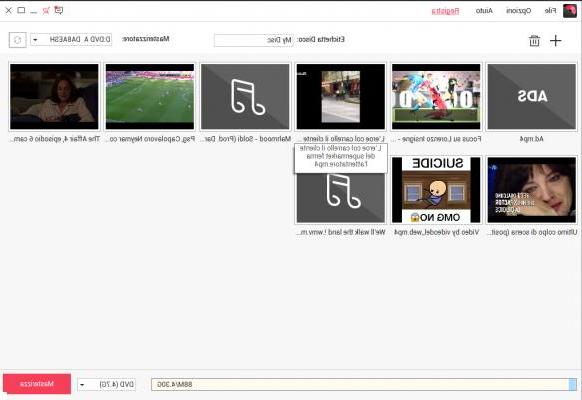
Below you can monitor the space available on the DVD disc, and also choose the type of DVD to burn.
Once you have added all the photos you can proceed with burning by clicking on BURN. In this way you will get a “data” DVD which is similar to a USB stick: once you insert the DVD into your computer and start it, inside you will see a folder with all the photos you just copied. The advantage of DVD disc over USB stick is that it is certainly easier to keep and archive, this is the main reason why many users still prefer DVD for data backup.
Burn Photos to DVD -


