Thanks to BlueStacks, you can use the screen, keyboard and mouse, as well as the power of your computer to run Android games and gain ergonomics and precision against your opponents.
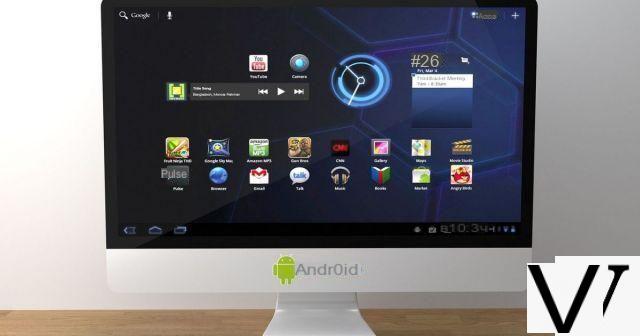
BlueStacks is an Android emulator for computers. It comes in the form of software that simulates version 7.1.2 of the mobile OS. It comes in 32-bit and 64-bit variants, the latter improving performance and RAM management. The minimum requirements to use it are a computer running Windows 8 or later, with virtualization options enabled.
The BlueStacks emulator can be used for free, with the presence of advertisements. By subscribing to a paid version, the user can remove the ads, benefit from advanced customization options and have priority technical assistance.
In this article, we are going to go over the main functions of BlueStacks and show what are the advantages of this Android emulator for playing on PC.
Download BlueStacksInstalling and configuring Android on BlueStacks
The BlueStacks installer is particularly automated and does not require any specific knowledge. However, like most newer Android emulators, BlueStacks requires the activation of virtualization technology to avoid stability issues. To do this, you must go to your BIOS, when you start your computer. The procedure varies depending on your configuration and the brand of PC.
"Intel Virtualization Technology" option in the BIOS of an ASUS branded laptop computer © ASUS Aptio Setup Utility
In general, you can access the BIOS by pressing one of the Esc, Del, F1, F2, F10 or F12 keys as soon as your computer screen turns on. In the menu that appears, find the option "Intel Virtualization Technology" and verify that it is activated or "Enabled", in English.
Once the installation of BlueStacks and Android is complete, the next step is to log into your Google account, just like from any new device running the mobile OS. You will then be able to access your Google Play account and thus download and install your previously purchased applications on your smartphone or tablet. It may be necessary to validate the connection to your Google Account from a new device via a notification on your mobile device or a message in your Gmail inbox.
Login to Google account when Android initializes © BlueStack Systems
BlueStacks emulates version 7 of Android: Nougat. The home screen displays a shortcut to the Google Play Store, installed apps, some game recommendations, and a toolbar offering access to settings, camera, browser and media managers, and of instances.
Emulator home page, once Android and three games are installed © BlueStack Systems
By selecting the gear-shaped “Settings” icon at the top right of the window, a comprehensive and modern settings menu is deployed. It allows you to define the resolution, the device profile, the graphics mode, the RAM and the number of CPU cores allocated, the display of notifications and the parameters specific to the game mode.
The software settings offer many practical options © BlueStack Systems
Add / Remove Applications
BlueStacks is very easy to use. All Android users will be immediately comfortable installing applications since it suffices to go through the Google Play Store, as on a smartphone or tablet.
It is also possible to install APK files from the home page through the menu represented by the three vertical dots, next to "Installed applications". You will be able to directly run APKs stored on your computer, without having to manually copy them into your Android session of BlueStacks.
The installation of applications is done directly from the Google Play Store © BlueStack Systems
To uninstall applications, there are also the same possibilities as on any Android device: through the Google Play Store, through the application settings and by long-clicking on a shortcut from the home screen.
A practical media manager
A handy tool built into the Android version of BlueStacks by default is the Media Manager. It is suitable for software to easily import and export documents between computer file system and Android session.
Access to the media manager from the reception © BlueStack Systems
This media manager opens immediately when an application searches for content (images to share or videos to edit, for example). You can then select files directly from your computer for use in Android applications.
The media manager directly imports and exports files from and to your hard drive © BlueStack Systems
Handy Features of BlueStacks
At the bottom of the software window, several buttons provide advanced functionality. There is in particular a "KeyMapper": a utility for assigning keys to define the game controls. To open it, select the icon in the form of a keyboard in the bar at the bottom of BlueStacks. You will then be able to determine keystrokes to perform combos and manage options to support zoom, free gaze, repeated tapping, tilting the device, etc.
Appearance of the game controls window, when running Hopeless Land © BlueStack Systems
The main interest of using BlueStacks is to take advantage of a controller, keyboard and mouse to handle games whose interface is intended for tactile use. But this requires assigning physical keys to touch keys on the screen. BlueStacks supports most popular games and directly offers default key "mapping".
As soon as a game application is launched, the game control window appears to allow you to customize the keys used. It can be opened at any time during the game by clicking on the KeyMapper icon, in the bar at the bottom of the window.
Right next to it, an eye icon offers "Toggle game controls". This means that it allows to display or not the "mapping" of the keys and their position on the screen, by setting the opacity.
Adjusting the opacity of the game controls that appear on the screen © BlueStack Systems
The next two options are still dedicated to players. The first allows you to lock the position of the mouse cursor and the second to record a video capture of the game. To use the latter, BlueStacks asks for confirmation to download a video recording plug-in and then offers to choose the directory to save the files.
This Android emulator of course offers the possibility to force the screen to rotate and run in full screen mode. Another useful feature of BlueStacks is location modification. The software allows you to define the location of your choice using Google Maps, with a simple click on the map or by using text search. You will be able to access certain servers or applications which filter the location of users.
Adjustment of the location according to the user's choice © BlueStack Systems
Captures in image format can be made by clicking on the penultimate icon representing a pair of scissors. The files are saved in your Pictures folder, inside a “BlueStacks” directory. The last function present in this toolbar is the simulation of a phone shake, which can be useful in some games and applications.
Download BlueStacksTo remember
BlueStacks is dedicated to all Android gamers looking to gain the upper hand over their opponents in multiplayer mode. For this, it allows you to play with a joystick or keyboard and mouse, from a large screen and taking advantage of improved graphics performance. What to confer an undeniable advantage during the game! This Android emulator is rich in features and designed for video game enthusiasts (video capture during the game, customization of the "mapping" of the keys and allocation of hardware resources).
Alternatives to BlueStacks:
- Genymotion
- Andy
And in addition: ApowerMirror
to read also: 17Are our Clic2Load tutorials hidden sponsored articles?
For a few months, we have been publishing tutorials and files written by Clic2Load. Some of our readers have told us about their ...
2 years ago


