 If the Crysis series has always served as a demonstration of technological force, the PC version of the second episode had however experienced a small ignition delay, corrected by the late appearance of patches. An error that seems to have served as a lesson for the Crytek studio, which immediately put the small - technical - dishes into the big ones for Crysis 3.
Historically linked to Far Cry, itself derived from a tech demo called X-Isle Dinosaurs Island, the Crysis license is to Crytek what Unreal has long been to Epic Games: a technology showcase intended to promote the flagship 3D engine of the studio. So much so that today, most games still do not do as well as the first Crysis, released in 2007.
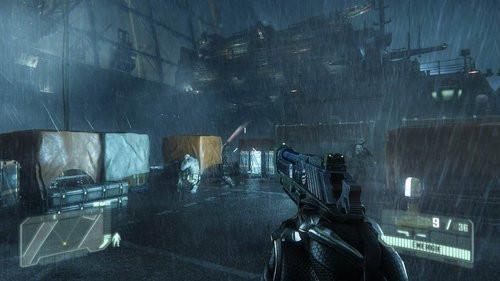
 The tropical island of the first Crysis has given way to an urban jungle.
To tell the truth, even the second episode of the series did not really know how to make us forget the first. Also available on consoles and probably hampered by multiplatform development, Crysis 2 did not really offer a graphics revolution when it was released in March 2011. The game was beautiful, of course, but not necessarily more than others. And for good reason: it was not until June that the saving patch 1.9, DirectX 11 update and HD texture pack were released. With three months of waiting to endure and three updates to install, you really had to be a video game and graphics card stakhanovist to enjoy the game in the best possible conditions. Most players simply missed out on the "real" Crysis 2.
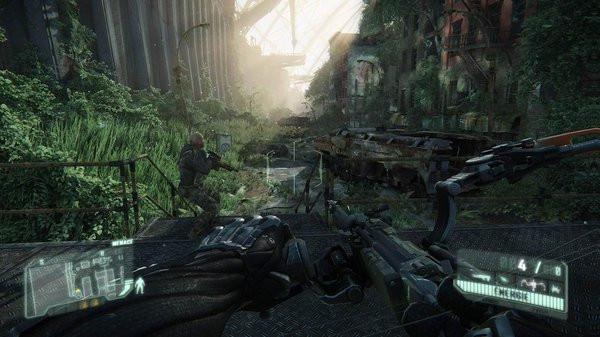
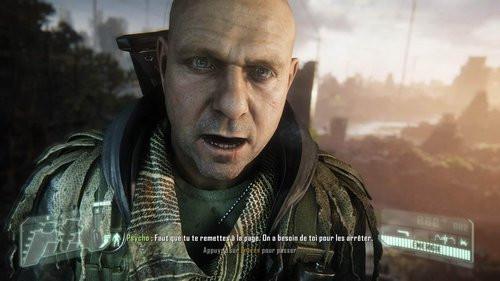
 Just like the second episode, Crysis 3 takes place in a New York in ruins.
Fortunately, history does not repeat itself for Crysis 3. Crytek's latest production comes straight to us in a version in top form. Moreover, this time, it is DirectX 9 which is not supported and we are automatically entitled to four levels of adjustment (low, standard, high, extreme) which, despite their renaming, correspond little or prou to the four settings of the patched version of Crysis 2 (high, very high, extreme, ultra). In addition to checking in detail the effect of each graphics option, we will also discuss in this article the console commands, which allow the game to be pushed much, much further. Further proof, if one were needed, that Crysis 3 is a new standard meter capable of heating our graphics cards for a few more years. Less popular than the unmissable Unreal Engine, Crytek's CryENGINE continues to improve. In its third version, it stands out as an engine capable of generating magnificent games, but above all succeeds in making a place for itself in a little more serious fields.
Despite the public and critical success of Far Cry, Crytek's first technology showcase when the German studio was working with Ubisoft, the CryENGINE never quite managed to sell well. Aside from Far Cry, the first version of the engine was notably only used in the MMORPG Aion. Apart from in-house productions (Crysis, Crysis Warhead) and a few confidential virtual universes, the CryENGINE 2 has hardly been talked about. And if the career of CryENGINE 3 clearly looks more promising, the fingers of both hands are enough to count the big games planning to rely on this solution (Crysis 2, Crysis 3, Fibble, Homefront 2, Mechwarrior Online, Sniper: Ghost Warrior 2, Star Citizen, Warface ...). We will not fail to notice that five of these games are directly from the various studios belonging to Crytek.
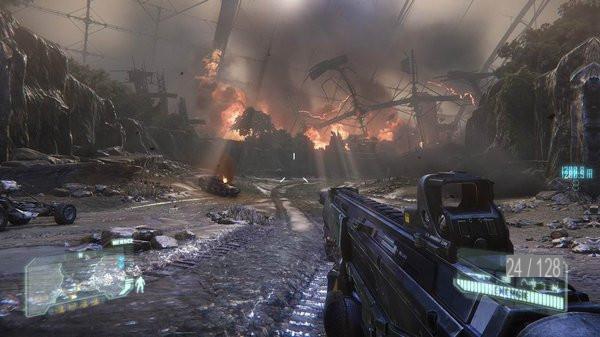
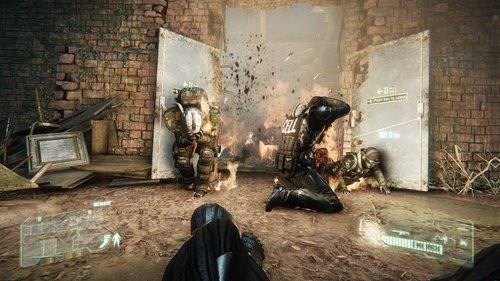
Thanks to CryENGINE 3, Crysis 3 is clearly one of the most beautiful games in the world.
However, the engine does not lack qualities. From SSAO to Subsurface Scattering via tessellation, it easily manages the latest fashionable effects. Relatively universal, it supports the PC like consoles and DirectX 9 like DirectX 11. The modular management of artificial intelligence, the visual and intuitive interface to create the environments, the advanced character animation system, and the availability of A free SDK for non-commercial use is also one of the strengths of the CryEngine solution.
But the truth is, the timid adoption of the Crytek tool by developers around the world is mainly due to the hegemony of the Unreal Engine, which unsheathed long before CryENGINE. The studios have already acquired the licenses and the teams are used to working on them. Switching to another engine, whatever its qualities, represents too great a risk in terms of finances and productivity. The next generation of consoles and the (relative) global restart of the industry that goes with it may be the occasion for the CryENGINE to finally impose itself.
Beyond the game
With the CryENGINE Cinebox platform, Crytek seeks to target customers from cinema and classic audiovisual production. Cinebox is quite simply a version of CryENGINE adapted to the specific constraints of these fields, in particular for everything concerning the virtual camera which, unlike video games, is not interactive for the final viewer.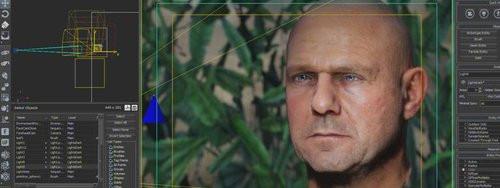
Artists can therefore precisely and easily adjust depth of field, focal length, motion blur effects, color correction or even the appearance of light halos. All this to make real animated films or, more frequently, to calculate preview scenes. These modern versions of storyboards make it easy for directors and tech crews to experiment with different options before shooting an actual scene or calculating a final render.
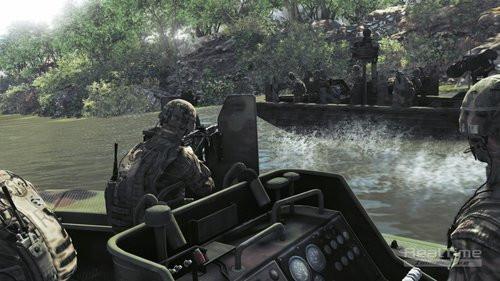
The field of "serious games" and simulations is also taken into account by Crytek, which even created RealTime Immersive, a studio specializing in this field. The CryENGINE 3 has thus already been used for the realization of a training program for the American army and of a virtual helicopter carrier for the Australian navy.
But then again, the competition is stiff for Crytek's engine. This time, it clashes directly with Bohemia Interactive's VBS2, an engine derived from the Real Virtuality Engine which powers the first Operation Flashpoint and the various episodes of ARMA. By moving from virtual war to real war, and from a simple game to the most serious applications, the CryENGINE 3 is in any case giving itself the means to success.
Editor configurations
| Configuration minimum | Recommended configuration | Configuration optimal | |
| OS | Windows Vista / 7/8 | Windows Vista / 7/8 | Windows Vista / 7/8 |
| Processor | Intel Core 2 Duo (2,4 GHz) ou AMD Athlon 64X2 (2,7 GHz) | Intel Core i5-750 (2,4 GHz) ou AMD Phenom II X4 805 (2,7 GHz) | Intel Core i7-2600K ou AMD FX-4150 |
| RAM | Go 2 | Go 4 | Go 8 |
| Graphic card | NVIDIA GTS 450 ou AMD Radeon HD 5770 | NVIDIA GTX 560 or AMD Radeon HD 5870 | NVIDIA GTX 680 or AMD Radeon HD 7970 |
| Video memory | 1024 MB | 1024 MB | 2048 MB |
| DirectX | DirectX 11 | DirectX 11 | DirectX 11 |
| Disk space | 17 GB of free space | 17 GB of free space | 17 GB of free space |
Even if it is available on consoles, Crysis 3 skips DirectX 9 (and therefore Windows XP) in its PC version. The opposite situation to that of Crysis 2 (which was limited only to DirectX 9 when it was released) and quite surprising when you consider that the two games use the same engine. At least, Crysis 3 is thus reviving its status as a technological showcase and a fun benchmark.
Express test of your PC
To find out easily and quickly whether you will be able to run Crysis 3, do not hesitate to use the sites capable of evaluating the behavior of your machine in relation to the configurations recommended by the publisher.The Can You Run it? offers this service for example. Once on the main page, choose Crysis 3 from the drop-down list and click on the launch button. After accepting the execution of the ActiveX or Java component necessary to collect information on your configuration, a comparison with the minimum, recommended and optimal publisher configurations will be displayed. The green / red color code will immediately alert you to items on your PC that may be insufficient.
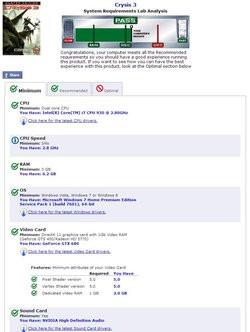
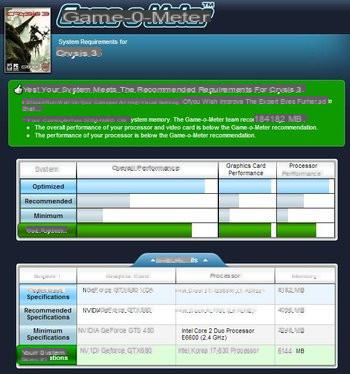 Can You Run It? and Game-o-Meter allow you to compare your PC with the recommended configurations for Crysis 3 in one click.
The Game-o-Meter service also uses the publisher's official recommendations, but compares them with your machine in a somewhat less theoretical way. Thanks to the 3DMark database which lists more than 20 million benchmarks, Futuremark's SystemInfo utility estimates the power of your PC as well as that of the minimum and recommended configurations. The results are then more precise than a simple succession of yes / no, since they take the form of three horizontal performance bars (one for the processor, one for the graphics card, and one general). A good way to instantly see if you narrowly exceed the recommendations or if you are far ahead.
Our test setup

- Processor Intel Core i7 930 (2,8 GHz)
- 6 GB DDR3 RAM
- NVIDIA GeForce GTX 680 2GB graphics card
- SSD Corsair Nova V128
- Operating System: Windows 7 64 bit
- Graphics drivers: GeForce 314.07
With a machine of this caliber, a resolution of 1920 x 1080 pixels, and all the settings to the maximum (with the exception of the anti-aliasing set to "low SMAA 1X"), the game remains generally fluid in terms of everything. what is displayed on the screen. It generally evolves between 30 and 60 frames per second, depending on the location and the action in progress, for a truly impressive visual result. On more modest machines, do not hesitate to lower the graphics quality. Crysis 3 remains very attractive in all cases, and some sharp but greedy effects go unnoticed in the heat of the moment anyway.This section of the options allows in particular to adjust the general visual quality, without having to go into the detail of each graphics option.
Resolution
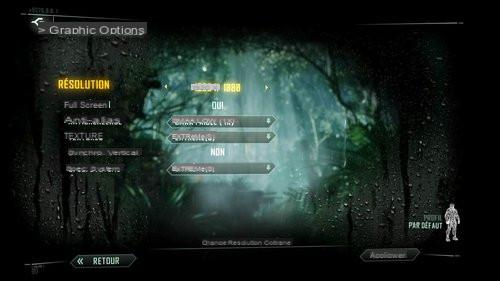
No choice of refresh rate or aspect ratio, Crysis 3 takes it easy when it comes to the resolution setting. Those who have a 4/3, 5/4 or 16/10 screen will have to go through the drivers of their graphics card so as not to have a distorted image, and thus recover a 16/9 format using black bands.
Full screen
If you want to play in windowed mode, set this option to No. On the other hand, to have access to "Full screen windowed" mode, you have to use the command console or the Cvar Configurator utility (see dedicated section).Anticrénelage
To say the least, Crysis doesn't do things halfway when it comes to antialiasing. This option menu offers ten choices and provides access to four different anti-aliasing methods.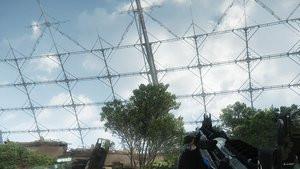
AA disabled and FXAA
Low SMAA (1X) and Standard SMAA (2TX)
SMAA High (4X) and TXAA Standard (2XT2)
TXAA High (4XT2) and MSAA Low (2X)
Standard MSAA (4X) and High MSAA (8X)
For a maximum quality / cost ratio, we recommend that you use the SMAA algorithm in Low or Standard mode. The performance impact is minimal, even though most staircase effects are properly removed. Conversely, the MSAA is certainly the least interesting of the algorithms. The visual result is very good, but it puts too much strain on the performance.
| disabled | FXAA | SMAA Low | SMAA Standard | SMAA High |
| 63 ips | 63 ips | 62 ips | 62 ips | 46 ips |
| TXAA Standard | TXAA High | MSAA Low | MSAA Standard | MSAA High |
| 49 ips | 43 ips | 51 ips | 45 ips | 35 ips |
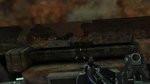
Textures
Avoid Weak mode of textures as much as possible, as some of them will be downright blurry and pixelated. On the other hand, from the Standard mode things get better. If your graphics card has enough memory, do not hesitate to switch to High or Extreme because performance will not be affected. Otherwise, don't have too many regrets, the improvements made by these two modes are hardly visible in the heat of the moment. In fact, even if you stick your nose to most textures, you don't see any difference.


Vertical synchronization
Intended to avoid the effects of image tearing (a screen that appears split into several parts for a brief moment), vertical sync freezes the number of frames per second at a whole fraction of the monitor's refresh rate. On a game as greedy as Crysis, we advise you to deactivate it. Otherwise, you will drop to 30 frames per second as soon as the game can no longer display 60 (even if it is potentially capable of displaying 59). Or even 20 frames per second, if your framerate is between 20 and 30.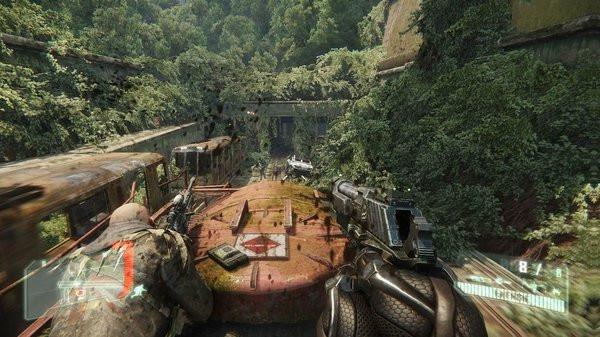 The faster and more dynamic a scene, the more likely it is that a brief image tearing will occur.
System Specifications
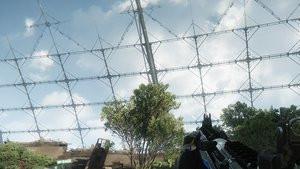
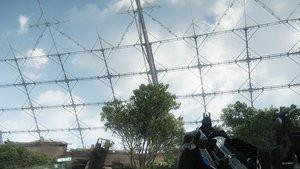
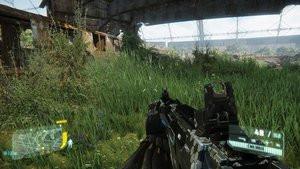
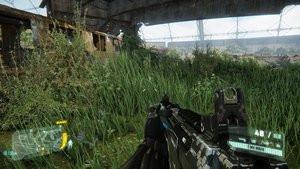
By setting this parameter to Low, Standard, High or Extreme, you will automatically change the values of the first seven options in the Advanced Graphics Options section, which will align with those of these System Specifications. To help you determine the best compromise, we compared the visual quality and smoothness of four different scenes for each of these four settings.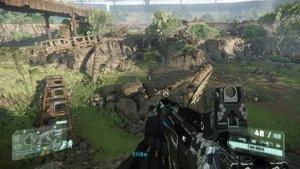
Unlike the texture settings, the difference between each level is noticeable and the progression relatively constant. The more the general quality is increased, the more the scenes appear contrasted (better management of shadows) and rich (distant objects more numerous and detailed).
| General quality | Low | Standard | High | Extreme |
| Indoor scene 1 | 85 ips | 63 ips | 58 ips | 43 ips |
| Indoor scene 2 | 101 ips | 95 ips | 73 ips | 46 ips |
| Outdoor scene 1 | 55 ips | 54 ips | 51 ips | 45 ips |
| Outdoor scene 2 | 59 ips | 58 ips | 55 ips | 45 ips |
| Average | 75 ips | 67 ips | 59 ips | 45 ips |
The performance impact of Extreme mode is significant, but the fluidity differences are much smaller between the other modes. The High mode therefore seems to be the best compromise for machines that are not able to run the game fully, it is in this section of the options that those who wish to configure the behavior of the game a little more precisely will find their happiness. .
Game effects
Not very speaking at the base, this parameter does not seem to change anything in the image any more. In reality, it corresponds to two or three minor settings, such as for example the number of milliseconds which must separate the display of two effects. Its greatest influence can be seen in the disappearance of bodies, depending on the time elapsed since the player last saw them and the distance between them. The more we push this option, the more the bodies will be persistent. The game being relatively linear and not really populated with an incredible number of enemies, we can without too much concern leave this option to the maximum.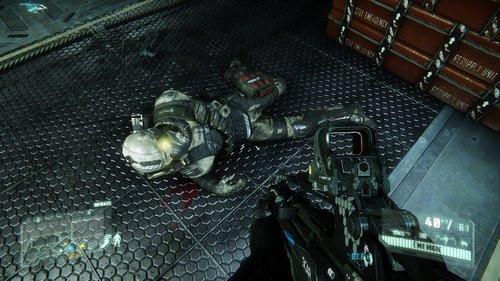 In FPS, assassins don't always return to the scene of their crimes
Objects
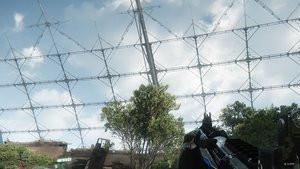
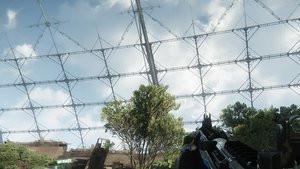
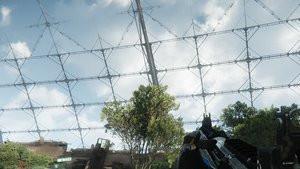
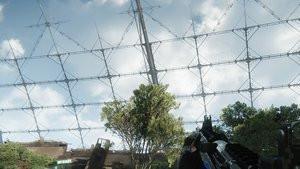
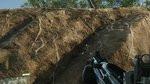
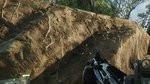
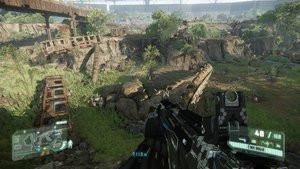
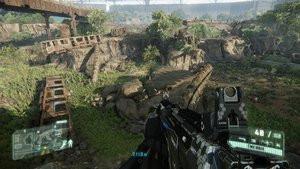
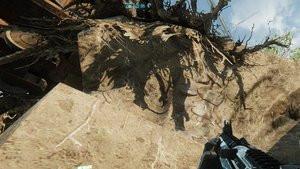
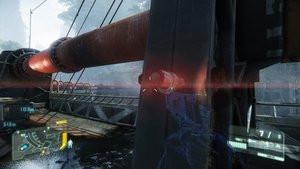
This parameter mainly influences the distance from which the geometry of the objects is diminished. In terms of performance and visual quality, its impact will therefore be much more noticeable on an outdoor scene than in a hallway. If your game starts to row excessively when you find yourself in the open air, it is by lowering the quality of the objects that you will be able to maintain a constant fluidity in all circumstances.| Objects | Low | Standard | High | Extreme |
| Interior stage | 59 ips | 57 ips | 56 ips | 55 ips |
| Outdoor stage | 43 ips | 40 ips | 36 ips | 35 ips |
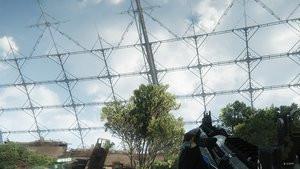
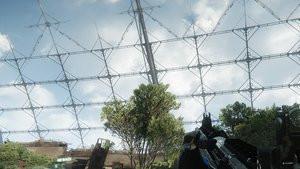
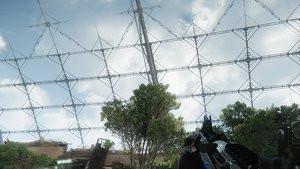
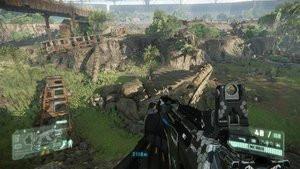
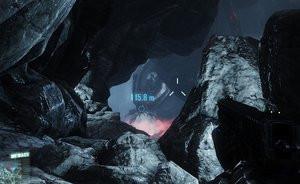
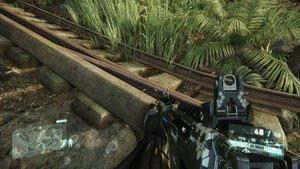
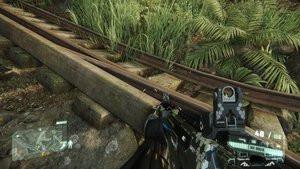
If you don't have a fluidity problem, push this parameter as far as possible to minimize the “pop-up” effects (objects that appear suddenly or suddenly change shape). In Extreme, the gaze can look into the distance without noticing anything abnormal, while in Weak even relatively close objects lack detail.
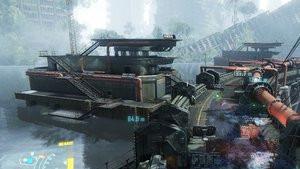
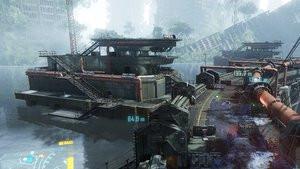
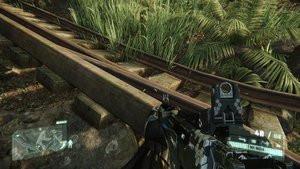
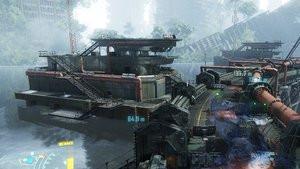 In particular, we can observe the differences in quality on the boat, the red pipes and the most distant vegetation elements.
particles
The number, behavior and quality of particle effects (sparks, smoke, etc.) are affected by this option. Depending on the level chosen, the particles will collide with more or less objects (only static objects or also dynamic objects), will or will not benefit from a motion blur effect and will possibly see their edges softened.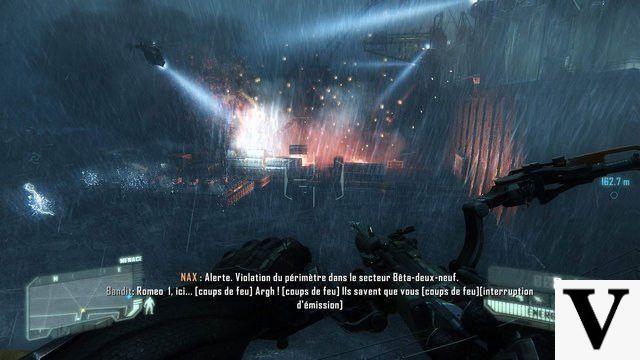
Since these are punctual and subtle effects, this parameter should not be relied on to generally improve the fluidity of the game. By default we can therefore leave the maximum value, and only lower it if we notes particular slowdowns during explosions and other such special effects.
Post treatment
It is difficult to know which exact post-processing algorithms are applied to the image after it is rendered. In use, there is especially a difference on certain distant backgrounds. In Low, Standard and High, they appear blurry. In the extreme, they remain sharp. According to the various measurements we have taken, the impact on performance is not very significant (around 2 to 6%).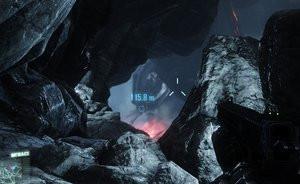
Shaders
In view of the impact on image quality, the shaders targeted by this option mainly concern the lighting system (SSAO type) and the shadows it generates. In Low and Standard, the image appears rather bland, while in High it is clearly more dense and contrasted, but all the same less precise and shaded than in Extreme.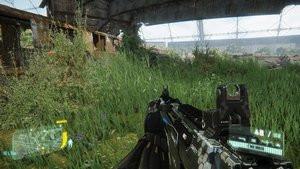

If the Extreme mode is clearly above the other three, it is also the most demanding. The difference in fluidity between Low and Standard is negligible. The High choice is the best compromise for machines unable to run in Extreme.
| Shaders | Low | Standard | High | Extreme |
| Interior stage | 96 ips | 94 ips | 85 ips | 69 ips |
| Outdoor stage | 74 ips | 70 ips | 67 ips | 55 ips |
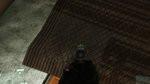
Shadows
In Weak, shadows are blurry due to their low definition. As standard, they become crisp and precise. In High and Extreme, they become blurred again to better simulate reality, but this time retain all their details.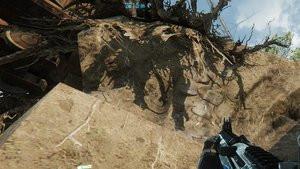
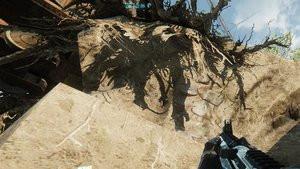
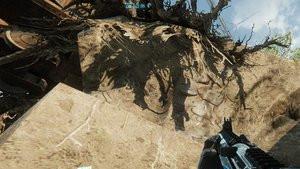
 In Weak, the shadows of the thinnest branches do not appear.
On our test machine, the loss in fluidity is often negligible when going from a given quality to that which is superior to it. Extreme Mode all!
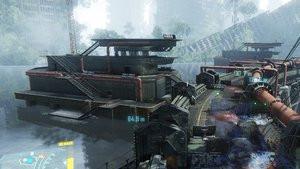
Water
This option is relatively anecdotal because the bodies of water are rare in the game. We are no longer on the tropical island of the first episode ... We should therefore not count on this option to hope to significantly influence the performances. . In addition, the increase in water quality (ripples and splashing) is not obvious. Except when going to Extreme! The ocean surface then benefits from tessellation, which significantly increases the height and power of the waves. A particularly visible effect in the first level of the game.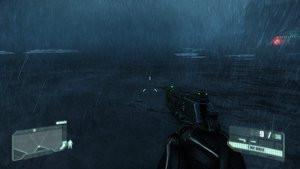

Anisotropic filtering
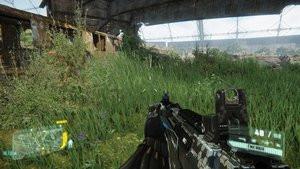
As always, anisotropic filtering improves the appearance of textures displayed obliquely to the camera (especially floors) without dropping the framerate. So don't hesitate to set it to its maximum value straight away (16X).
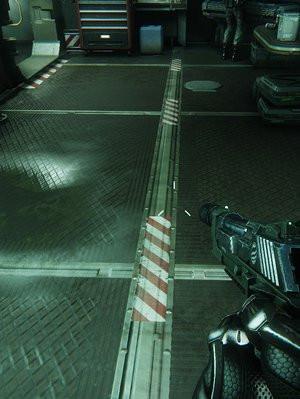 The effect of anisotropic filtering is observed especially at the bottom of the image.
Motion blur
By blurring the scenery during rapid movements, while leaving the weapon in focus, motion blur brings a more cinematic aspect to the game. The dedicated option allows you to deactivate the effect, as well as setting it to three levels (Low, Standard , High). Knowing that we have not noted any noticeable impact on performance, it is mainly your taste that should dictate this choice. Rest assured, the blur effect is much less noticeable in game than in this freeze frame.
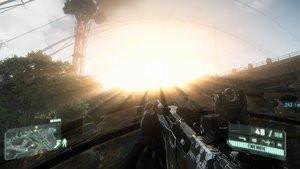
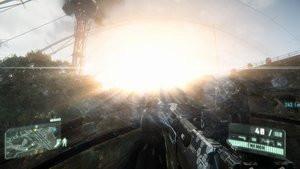
Light halos
The famous "lens flares", which simulate the refraction of light on the lens of the virtual camera, benefit from particular care here. Depending on the light sources, they take different forms and reveal different “defects” (dirt on the visor of the nanosuit, for example). We are very far from the small luminous circles of the other games. The impact on performance of such a one-off effect is obviously totally negligible. There is therefore no reason to deactivate it, unless you are allergic to it.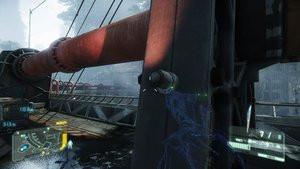
 If the two most important sections of the options obviously concern the graphics, it can also be interesting to take a little tour in the other menus.
Part
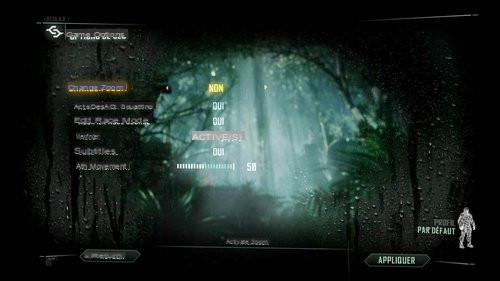
Please note, the Spanish definitions of the different options are not necessarily clear. It is not a question of "activating the zoom", of "changing position" or of "deactivating the sprint", but rather of choosing between an "on / off" mode and a "continuous press" mode for the zoom. , squatting and sprinting. The English version of this section is much more understandable (Zoom toggling, Crouch toggling and Sprint toggling). Note that activating the viewfinder display has no effect on difficulty modes greater than Veteran. As for the "ATH Movement" parameter, it allows you to adjust the force with which the interface elements move when the player is moving.
Shipping is
The three sliders of music, sound effects and dialogues allow in theory to achieve a mix with little onions. In practice you will not escape a serious problem of French version: the different sentences of the same dialogue have not always been recorded with the same sound level. If you sometimes find yourself suddenly having to strain your ears during dialogue, pushing around these sliders will not change anything.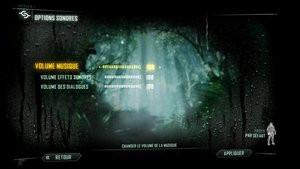
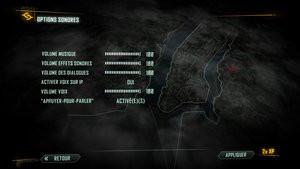 The same menu does not offer the same options depending on whether it is accessed from the solo or the multi.
If you are looking for audio options dedicated to multiplayer mode, be aware that they are missing from the basic options menu. To access it, you must first launch the multiplayer mode. The classic “Activate Voice over IP”, “Voice Volume” and “Press to talk” parameters will then appear in this section.
Brightness
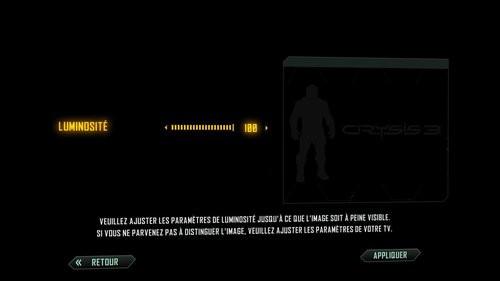
Nothing rocket science here, just adjust the brightness so that the image on the right is barely visible on the screen. Feel free to push the slider all the way if you're playing 3D with a first-generation 3D Vision kit.
Security zone
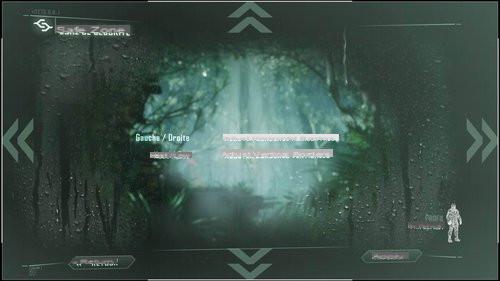
More intended for televisions than monitors, this option allows you to adjust the size of the screen, both horizontally and vertically. Note that this parameter is no longer accessible when 3D is activated.
Options 3D
Crysis 3 is one of the few games to support 3D natively. If you have a 3D Vision kit, it is naturally possible to let the pilot manage this. But those who would like to connect their PC to a 3D TV, for example, can activate a side-by-side mode and an interlaced mode here.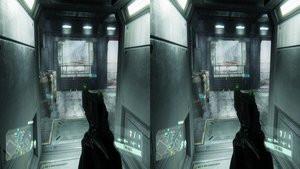
If there is no 3D kit, connect your PC to a 3D TV and choose the appropriate option.
In all cases, the 3D conforms to that of Crysis 2. Namely: extremely clean (no ghosting, badly placed 2D elements, shadow problems or any other visual artifact) but hardly immersive (impression of seeing several 2D plans rather than a real 3D scene).
My Orders
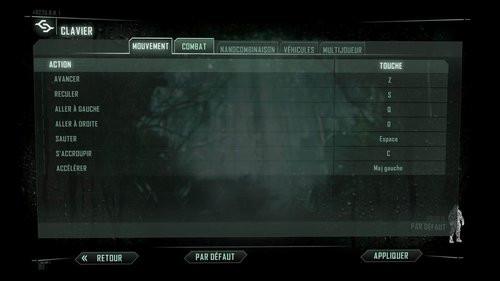
This is where you will adjust the sensitivity of the mouse, and even that of the controller if you have bad taste (to make amends, at least have the decency to deactivate the shooting assistance) ... the possibility of modifying the keys of the keyboard, but beware: after having touched these settings, some players found themselves blocked by scripts of the game which did not launch any more. If you are the victim of a similar problem, be aware that resetting the default configuration will solve it instantly. Already provided with graphics options, Crysis 3 offers us to go much further through the command console. The developers have even cracked a tool intended to make life easier for hacker players.
Command console
Aware of being a game for those who like to get their hands dirty, Crysis 3 does not block the control console. As is customary, the latter is called by pressing the "²" key (or any other key located above Tab for those who have an exotic keyboard). Then, all you have to do is enter one of the many commands available to immediately make the interface disappear, modify the field of vision, activate a certain graphic effect, increase certain display distances, etc.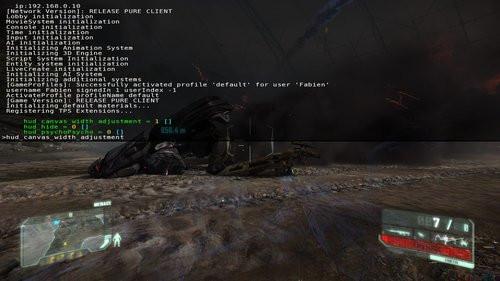
The possibilities are extremely varied, and you will find the exhaustive list below. For example, typing "hud_hide" followed by the enter key will remove all interface elements. Other commands require you to enter numeric values instead. For example, typing "s_SFXVolume 0.5" reduces the volume of sounds to half of their maximum value. Remember to use the up arrow key to bring up the last command entered without having to retype it, and to use the Tab key to scroll through the different commands starting with the letters already typed.
Cvar Configurator
If the console is very practical for quickly testing different commands, it would be tedious to enter them all each time the game is launched once you have found your preferred configuration. To remedy this problem, they can be entered by hand in the autoexec.cfg and system.cfg files which are located at the root of the game. But there is even easier!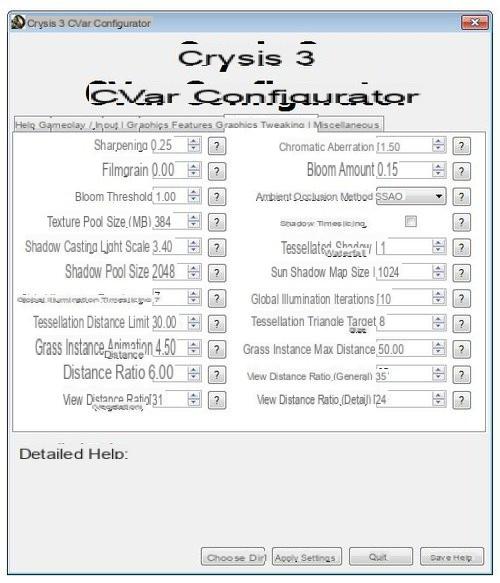
By downloading this file, you will have access to a utility developed by Crytek. Called Cvar Configurator, it allows you to very easily configure all the console variables (the famous Cvar) by simply checking boxes and entering numerical values. By clicking on "Apply Settings", the utility will take care of saving everything you need in the .cfg files.
Console commands
Here is the full list of commands that can be entered in the console. The names of the sections have been kept in English for reasons of consistency with the name of the different Cvar, but we have translated their descriptions into Spanish.Gameplay
Field of View
CVar : cl_fovTo be placed in system.cfg
The vertical field of view (FOV) is expressed in degrees. cl_FOV controls the primary field of view. You can also use the following commands:
r_DrawNearFOV controls the FOV of nearby objects (hands holding the weapon)
pl_movement.power_sprint_targetFOV controls FOV during sprints
Default: 60
HUD Bobbing
CVar : cl_bobhudTo be placed in system.cfg
Corresponds to the ATH Movement parameter.
Default: 1.0
HUD Canvas Adjustment
CVar : hud_canvas_width_adjustmentTo be placed in system.cfg
Applies to multiplayer only. Expands the virtual space of the HUD to overflow it beyond the limits of the display in a multi-monitor installation. Before the multiplier is applied, the interface is limited to a 16: 9 resolution.
Default: 1.0
Hud Hide
CVar: hud_hideTo be placed in system.cfg
By activating this cvar, the interface elements disappear completely. Perfect for taking screenshots or increasing player immersion. Sometimes this setting needs to be re-entered after saving or loading.
Default value: off (interface visible)
Music Volume
CVar : s_MusicVolumeTo be placed in system.cfg
Controls the volume of the music, from 0.0 to 1.0.
Default value: 1.0 (maximum volume)
SFX Volume
CVar: s_SFXVolumeTo be placed in system.cfg
Controls the volume of sound effects, from 0.0 to 1.0.
Default value: 1.0 (maximum volume)
Dialog Volume
CVar : s_DialogVolumeTo be placed in system.cfg
Controls the volume of dialogues, from 0.0 to 1.0.
Default value: 1.0 (maximum volume)
Max FPS Limit
CVar : sys_MaxFpsTo be placed in system.cfg
Limit the framerate to a given value. A value of 0 corresponds to no limit.
Default: 0
Starter
Toggle Crouch
CVar : cl_crouchToggleTo be placed in system.cfg
Operates the crouch key in a "switch" mode.
Default value: on
Toggle Zoom
CVar : cl_zoomToggleTo be placed in system.cfg
Operates the zoom key in a "switch" mode.
Default value: on
Mouse Smoothing
CVar : i_mouse_smoothTo be placed in system.cfg
Set the mouse smoothness value (0.0 = off, 1.0 = very smooth, 30 = almost immediate)
Default: 0.0
Mouse Acceleration
CVar : i_mouse_accelTo be placed in system.cfg
Set mouse acceleration (0.0 = disabled)
Default: 0.0
Mouse Acceleration Max
CVar : i_mouse_accel_maxTo be placed in system.cfg
Sets the maximum mouse delta when acceleration is enabled.
Default: 100.0
Mouse Sensitivity
CVar : cl_sensitivityTo be placed in system.cfg
Defines the sensitivity of the mouse.
Default: 30.0
Graphic features
Particle Collisions
CVar : e_ParticlesObjectCollisionsTo be placed in autoexec.cfg
Controls which objects the particles will collide with.
Default values: Static (in Low / Standard), Dynamic (High / Extreme)
None: no particle collision
Static: Particles collide with static objects.
Dynamic: Particles collide with static and dynamic objects.
Particle Motion Blur
CVar : e_ParticlesMotionBlurTo be placed in autoexec.cfg
Turns on or off the motion blur effect on fast moving particles.
Default: Off (Low / Standard / High), On (Extreme)
Force Soft Particles
CVar : e_ParticlesForceSoftParticlesTo be placed in autoexec.cfg
Forces all particles to use smooth intersections with the geometry (eliminates the effect of sharp edges on the particles).
Default: Off (Low / Standard / High), On (Extreme)
Tessellation
CVar : e_TessellationTo be placed in autoexec.cfg
Enables or disables all DirectX 11 tessellation effects.
Default: Off (Low / Standard / High), On (Extreme)
Not adjustable in the current version of the game. Will be adjustable soon.
Water Ocean Tessellation
CVar : r_WaterTessellationHWTo be placed in autoexec.cfg
Turns DirectX 11 tessellation effects on or off for ocean water surface.
Default: Off (Low / Standard / High), On (Extreme)
Pixel Accurate Displacement Maps
CVar : r_SilhouettePOMTo be placed in autoexec.cfg
Enables or disables Pixel Accurate Displacement Mapping (very demanding).
Default: Off (Low / Standard / High), On (Extreme)
Real-time Global Illumination
CVar: e_GITo be placed in autoexec.cfg
Turns real-time global illumination on or off.
Default: Off (Low), On (Standard / High / Extreme)
Real-time Volumetric Cloud Shadows
CVar : r_FogShadowsTo be placed in autoexec.cfg
Turns realtime shadows of volumetric clouds on or off.
Default value: Off (Standard / Low), On (High / Extreme)
Volumetric Water Shadows
CVar : r_FogShadowsWaterTo be placed in autoexec.cfg
Turns realtime shadows of volumetric clouds underwater on or off.
Default: Off (Low), On (Standard / High / Extreme)
Screen-space Reflections
CVar : r_SSReflectionsTo be placed in autoexec.cfg
Enables or disables the Screen-Space reflections effect on shiny or reflective materials.
Default: Off (Low / Standard / High), On (Extreme)
Depth of Field
CVar : r_DepthOfFieldTo be placed in autoexec.cfg
Turns the depth of field effect on or off.
Default value: On
Not adjustable in the current version of the game. Will be adjustable soon.
Explosion Blur
CVar: g_radialBlurTo be placed in autoexec.cfg
Turns on or off the radial blur effect applied after an explosion.
Default value: On
Color grading
CVar : r_ColorGradingTo be placed in autoexec.cfg
Enables or disables the colorimetric post-processing effect chosen by the artists.
Default value: On
Graphic hacks
Sharpening
CVar : r_SharpeningTo be placed in autoexec.cfg
Controls the level of the image refinement post-processing effect. A large value increases sharpness, but values that are too large may create visual artifacts. A value of 0.0 corresponds to deactivation of the effect.
Default: 0.25
Chromatic Aberration
CVar : r_ChromaticAberrationTo be placed in autoexec.cfg
Controls the level of the chromatic aberration post-processing effect. A value of 0.0 corresponds to deactivation of the effect.
Default: 1.5
Filmgrain
CVar : r_HDRGrainAmount
To be placed in autoexec.cfgControls the level of grain applied to the final image to mitigate artifacts due to inaccuracy in 32-bit color display. A value of 0.0 corresponds to deactivation of the effect.
Default: 0.0
Bloom amount
CVar : r_HDRBloomRatioTo be placed in autoexec.cfg
Controls the level of bloom used to simulate excessively bright areas of the screen.
Default: 0.15
Bloom threshold
CVar : r_HDRBrightLevelTo be placed in autoexec.cfg
Controls the brightness threshold used to calculate the bloom.
Default: 1.0
Ambient Occlusion Method
CVar : r_ssaoTo be placed in autoexec.cfg
Defines the method of ambient occlusion.
Default: SSAO (Low / Standard / High), SSDO (Extreme)
None: no ambient occlusion
SSAO : Screen-space Ambient Occlusion.
SSDO : Screen-space Directional Occlusion.
Texture Pool Size (Mo)
CVar : r_TexturesStreamPoolSizeTo be placed in autoexec.cfg
Defines the size of the video memory reserved for texture streaming. Values are expressed in MB and may be limited by the amount of video memory detected.
Default: 192 (Low), 384 (Standard), 512 (High / Extreme)
Shadow Timeslicing
CVar : e_GsmCacheTo be placed in autoexec.cfg
Saves GPU power by updating distant shadows less often.
Default: On (Low), Off (Standard / High / Extreme)
Shadow Casting Light Scale
CVar : e_ShadowsResScaleTo be placed in autoexec.cfg
Controls the resolution of the shading maps used for each light source. The value is an arbitrary multiplier. Doubling it will therefore double the resolution of each light.
Default value: 3.4 (Low / Standard / High), 40 (Extreme)
Tessellated Shadow Cascades
CVar : e_ShadowsTessellateCascadesTo be placed in autoexec.cfg
Determines the number of cascading shadows for the tessellation. A value of 0 disables tessellation for all shadows.
Default value: 1
Not adjustable in the current version of the game. Will be adjustable soon.
Shadow Pool Size
CVar : e_ShadowsPoolSizeTo be placed in autoexec.cfg
Sets the size of the shadow pool. A larger size increases the resolution of shadows and produces less visual artifacts from light sources (except the sun). The value must be a power of 2 (128, 256, ...). If the pool is too small to support the minimum size needed for lights, GPU performance will be severely impacted.
Default value: 2048 (Low / Standard / High), 4096 (Extreme)
Sun Shadow Map Size
CVar : e_ShadowsMaxTexResTo be placed in autoexec.cfg
Sets the size of each shadow cascade from the sun. Larger size increases the resolution of shadows from the sun.
Default: 512 (Low), 1024 (Standard / High / Extreme)
Global Illumination Timeslicing
CVar : e_GICacheTo be placed in autoexec.cfg
Defines the number of frames that cache the global illumination value before it is recalculated. A value of 0 disables the cache and recalculates the global illumination for each frame.
Default: 7
Global Illumination Iterations
CVar: e_GIIterationsTo be placed in autoexec.cfg
Defines the number of iterations performed to calculate global illumination. A higher value reduces the effect of color bleeding (transfer of colors) and increases the distance of propagation of the light.
Default: 10
Tessellation Distance Limit
CVar : e_TessellationMaxDistanceTo be placed in autoexec.cfg
Defines the distance (in meters) at which tessellation is no longer applied to objects.
Default: 30
Tessellation Triangle Target Size
CVar : r_TessellationTriangleSizeTo be placed in autoexec.cfg
Defines the length of the edges of the triangles (in pixels) to reach during tessellation.
Default: 8
Grass Instance Animation Distance
CVar : e_MergedMeshesInstanceDistTo be placed in autoexec.cfg
Distance from which the interactive grass will no longer be animated.
Default value: 4.5 (Low / Standard / High), 8.0 (Extreme)
Grass Instance Max Distance
CVar : e_MergedMeshesViewDistRatioTo be placed in autoexec.cfg
This multiplier controls the distance from which interactive grass will no longer be displayed.
Default: 50
LOD distance ratio
CVar: e_LodRatioTo be placed in autoexec.cfg
Controls the distance from which objects pass at a low level of detail.
Default: 4 (Low), 6 (Standard) 20 (High), 40 (Extreme)
View distance ratio (General)
CVar : e_ViewDistRatioTo be placed in autoexec.cfg
Controls the distance from which objects are no longer displayed.
Default: 25 (Low), 35 (Standard) 100 (High / Extreme)
View distance ratio (Vegetation)
CVar : e_ViewDistRatioVegetationTo be placed in autoexec.cfg
Controls the distance from which vegetation is no longer displayed.
Default: 21 (Low), 31 (Standard) 100 (High / Extreme)
View distance ratio (Detail)
CVar: e_ViewDistRatioDetailTo be placed in autoexec.cfg
Controls the distance from which objects marked as "details" by artists are no longer displayed.
Default: 19 (Low), 24 (Standard) 100 (High / Extreme)
Diverse
Skip Intro Movies
CVar: g_skipIntroTo be placed in system.cfg
Skip the cutscenes usually played at game launch.
Default value: Off
Fullscreen window mode
CVar : r_FullscreenWindowTo be placed in system.cfg
Activates the "windowed full screen" (window that fills the screen and facilitates the Alt-Tab). Classic windowed modes continue to function normally.
Default value: Off
Disallow Fullscreen Pre-emption
CVar : r_FullscreenPreemptionTo be placed in system.cfg
Prevents pop-ups and other “priority stealing” windows from minimizing the game.
Default value: On
Force Output Monitor
CVar : r_overrideDXGIOutputTo be placed in system.cfg
Specifies the display number to use when creating the game window. 0 is the default monitor, and 1, 2, etc are the display devices that follow it. Used to display the game elsewhere than on the main screen (for example on a television).
Default: 0
Multi-GPU Support
CVar : r_MGPUTo be placed in system.cfg
Defines multi-GPU support.
Default value: Autodetect
Disabled: no multi-GPU support.
Forced: Multi-GPU support is forced.
Autodetect: the CryEngine automatically detects whether or not to enable multi-GPU support.
Hardware Gamma Level
CVar: r_GammaTo be placed in system.cfg
Changes the hardware level of gamma. Also affects the desktop.
Default: 1.0
Internal Occlusion Culling
CVar : e_CoverageBufferReprojTo be placed in autoexec.cfg
Controls the culling occlusion. Only change this variable if you experience popping effects during rapid movements.
Default value: On
Game Network Port
CVar: g_blaze_gamePortTo be placed in system.cfg
Enables connections to network ports.
Enable Blaze VOIP
CVar : net_blaze_voip_enableTo be placed in system.cfg
Active la VOIP Blaze.
Default value: On
Enable Blaze VOIP PTT
CVar : net_blaze_voip_enable_pttTo be placed in system.cfg
Activates the Push-to-talk feature of the VOIP Blaze.
Default value: On
Enable Blaze VOIP
CVar: net_blaze_voip_playback_volumeTo be placed in system.cfg
Sets the volume of the VOIP Blaze (from 0.0 to 1.0).
Default value: 1.0 (maximum volume) Just like Crysis in its day, Crysis 3 has everything it takes to become the new benchmark in graphics. The founder of Crytek even seems particularly confident in the future ...
Chance of the calendar, it is the day before the Spanish release of Crysis 3 and the day after its American release, that Sony unveiled the PlayStation 4. If these two news seem a priori to have no relation, it remains all the same relevant to build a bridge between the two. Because if the CryENGINE has not really succeeded in winning against the Unreal Engine on the current generation of consoles, the cards may be redistributed for the next one. Cevat Yerli, CEO of Crytek, even thinks he has a head start.
Not only did he recently claim that "Crysis 3 absolutely gets the most out of consoles, there isn't even 1% wiggle room left" but he even added "I really think people will be amazed at how little Crysis 3 differs. and next-gen launch titles from other studios ". A confidence that is not really new since even two years ago, he called Crysis 3 "already ready for the next generation". One thing is certain: if we put the PC version of the game into the equation, and the means given to us to push it to its limits, the next-gen consoles are hardly likely to impress us.
 Will Crysis 3 bring down the first next-gen games?
In 2005, the Xbox 360 included much more advanced components than those found in most PCs. In 2006, the PlayStation 3 offered an unusual architecture, based on a CELL processor (a main core and seven specific cores). Today, the next-gen seems to be hitting a glass ceiling somewhat from a technical point of view. The first official specifications for the PS4, and the leaked ones for the upcoming Xbox, all suggest a PC-like architecture, making comparisons even easier. In both cases we should be dealing with an eight-core central processor, 8 GB of RAM and a DirectX 11 graphics chip. Nothing that is beyond the reach of a PC in 2013 or 2014 ... So let's get comfortable in front of our monitors, let's happily launch Crysis 3 and exclaim in chorus: "the next-gen is now!".
Find our other technical guides:
- Far Cry 3
- Assassin's Creed III
- Borderlands 2
- Max Payne 3
- Diablo III
- Batman Arkham City
- Battlefield 3
For further.... :
- Find all the latest Crysis 3 news at Jeuxvideo.com
- Find the test of Crysis 3 by Jeuxvideo.com


![[Solved] Windows 10 Insufficient Memory (RAM) Problem -](/images/posts/aabafb64e368ee47c956532867079e57-0.jpg)